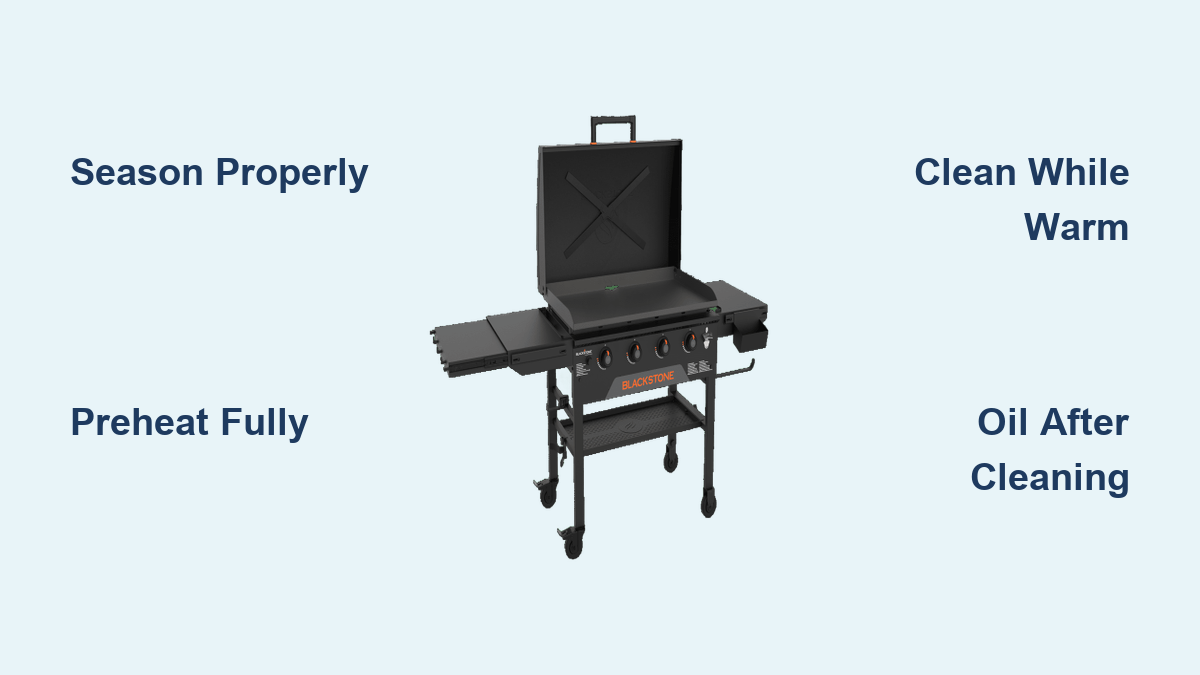
How to Use a Blackstone Grill
You just unboxed your new Blackstone griddle and are ready to fire it up, but where do you start? Whether you’re cooking breakfast for the family, searing steaks, or whipping up hibachi-style noodles, knowing how to use a Blackstone grill makes all the difference. This powerful outdoor cooking station heats fast, cooks evenly, and lets you prepare entire meals in one place. Without the right setup, seasoning, and technique, you risk rust, sticking, or even safety hazards.
Using a Blackstone griddle requires proper initial cleaning, seasoning, heat management, and post-cook maintenance to keep it performing like new. Once you master the basics, like creating heat zones, avoiding common mistakes, and cleaning while warm, you’ll wonder how you ever cooked outdoors without it. In this guide, you’ll learn every step from setup to shutdown, including pro tips for pancakes, burgers, stir-fries, and more.
Initial Setup and Safety Checks
Before lighting your Blackstone griddle for the first time, complete these essential setup steps to ensure safe and efficient operation.
Verify Plate and Gas Connections
Ensure the rolled steel griddle plate is securely seated in the four mounting slots, two on each side. A loose or misaligned plate can create uneven heating and safety risks. Next, inspect all gas connections between the propane tank and the griddle. Hand-tighten the hose fitting and check that the regulator is properly attached. Never use tools to over-tighten, as this can damage the threads.
Test for Gas Leaks
Gas leaks are dangerous but easy to prevent. Open the propane tank valve slowly and apply a soapy water solution (dish soap and water) to all connection points. If bubbles form, there’s a leak. Turn off the gas immediately, retighten the connection, and retest. Only proceed once no bubbles appear. This step is non-negotiable for safe griddle use.
Confirm Propane Tank Readiness
Use a standard 20-lb propane tank with an OPD (Overfill Protection Device) valve, the most common type for outdoor appliances. Ensure the tank is at least half full. A low tank may not deliver consistent pressure, leading to weak flames and poor heating. Keep a spare on hand for long cook sessions.
Remove Factory Coating
Blackstone griddles arrive coated with a protective oil to prevent rust during shipping. This layer is not food-safe and must be removed before seasoning.
Wash with Dish Soap
Turn all burners to low and heat the griddle for 5 minutes to loosen the coating. Once warm, turn off the unit. Using gloves and a non-scratch scrub pad, wash the surface thoroughly with hot water and grease-cutting dish soap. Scrub every inch, including the grease trough around the edges.
Dry and Pre-Oil
Rinse completely and dry the surface with clean towels. Any moisture left behind can cause immediate rusting. After drying, apply a thin layer of cooking oil (canola or vegetable oil works) to the top and bottom of the plate using a lint-free cloth. This protects the metal until you begin seasoning.
Season the Griddle Surface
Seasoning creates a natural non-stick layer by bonding oil to the steel through heat. This step prevents rust, stops food from sticking, and enhances flavor over time.
Heat and Oil Application
Turn all burners to high and let the griddle heat for 10–15 minutes. The surface will begin to change color as it expands. Once hot, use tongs and a folded paper towel soaked in high-smoke-point oil (avocado, Crisco, or Blackstone’s own seasoning oil) to wipe a thin, even layer across the entire surface.
Burn Off and Repeat
The oil will smoke heavily. This is polymerization, the chemical process that forms the seasoning layer. Let it burn off for 10–12 minutes until smoke reduces. Repeat this oil-and-burn cycle 3–4 times. After the final round, the surface should appear dark brown or black and shiny.
Know When It’s Ready
A properly seasoned griddle looks uniformly dark with no patches of bare metal. It may feel slick to the touch (use gloves). Avoid using too much oil. Pooling leads to a sticky, uneven finish. Once seasoned, your griddle is ready for its first cook.
Ignite and Preheat Properly
Starting your griddle safely and correctly ensures consistent heat and prevents dangerous gas buildup.
Follow the 3-Second Ignition Rule
Open the propane tank valve fully. Turn one burner knob to “start/high” and press the igniter within 3–4 seconds. Delaying ignition allows unburned gas to accumulate, which can cause a dangerous flare-up or explosion. Repeat for each burner if lighting individually.
Preheat Based on Food Type
Preheating time depends on what you’re cooking:
– Eggs, pancakes: 5 minutes on low
– Burgers, sausages: 8–10 minutes on medium
– Steaks, searing: 10–12 minutes on high
The steel retains heat aggressively, so food cooks faster than on a stovetop. Use an infrared thermometer if available. Ideal searing temps are 350°F–400°F.
Create Heat Zones for Versatility
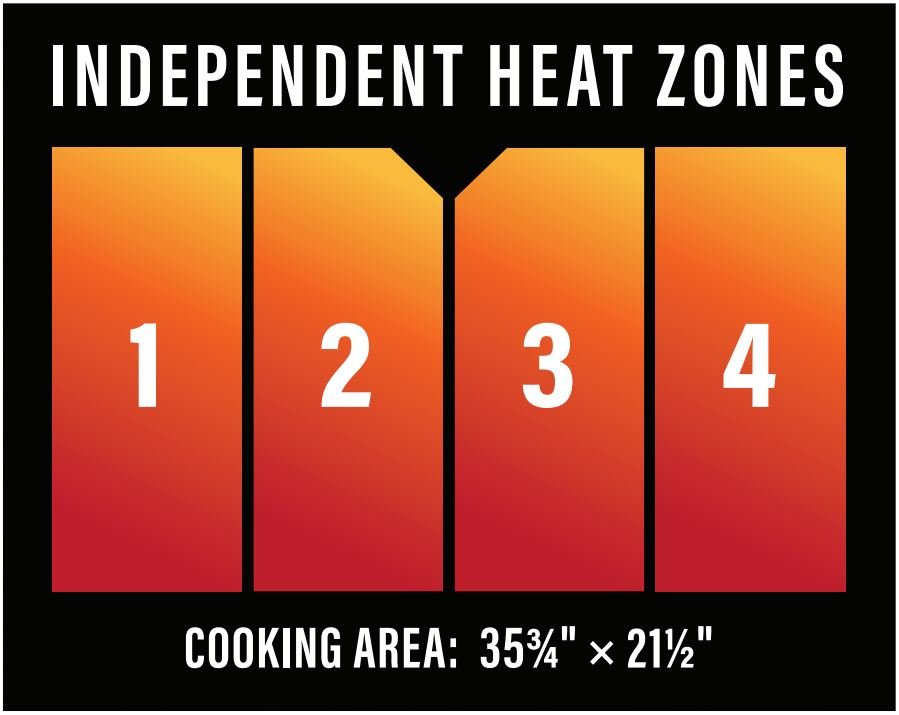
One of the biggest advantages of a Blackstone griddle is the ability to cook multiple foods at once using heat zoning.
Divide the Cooking Surface
Set one side to high heat (for searing meats), another to medium (for sautéing veggies), and a third to low (for keeping food warm or cooking eggs). This mimics a full kitchen range and allows for full-meal cooking in one session.
Use Residual Heat Wisely
After cooking hot items, turn off the burners and use the cooling surface to gently cook delicate foods like scrambled eggs or melt cheese. The retained heat is often sufficient, reducing the risk of burning.
Prevent Food from Sticking
Sticking is the most common issue, but it’s almost always preventable.
Key Anti-Stick Strategies
- Maintain seasoning: A dark, slick surface is your best defense.
- Preheat the griddle: Cold steel equals sticking food.
- Oil before cooking: Apply a light coat of oil or butter right before adding food.
- Let food sear: Don’t move burgers or steaks immediately. Wait for natural release.
If food sticks, don’t force it. Increase heat slightly, add oil, and wait. If sticking persists, the surface likely needs re-seasoning.
Cook a Variety of Foods

The Blackstone griddle handles nearly any food you’d cook in a skillet, plus some you can’t on a traditional grill.
Best Breakfast Foods
- Eggs: Cook on low with butter. Flip gently with a thin spatula.
- Pancakes: Use medium heat. Flip when bubbles pop and edges set.
- Bacon and Sausage: Start on cold surface to render fat slowly, then increase heat.
Master Burgers and Meats
- Smash Burgers: Place room-temp patties on high heat. Press flat with a spatula immediately.
- Steaks: Sear 3–4 minutes per side. Add butter, garlic, and herbs in the last minute.
- Chicken Wings: Cook 20–25 minutes, flipping often, until internal temp reaches 165°F.
Make Stir-Fries and International Dishes
- Fried Rice: Use day-old rice. Scramble eggs first, then add rice, soy sauce, and veggies.
- Fajitas: Slice peppers and onions thin. Sear with oil and fajita seasoning.
- Quesadillas: Butter tortillas, add cheese and fillings, fold, and toast until golden.
Shut Down Safely
Proper shutdown protects your griddle and prevents accidents.
Turn Off in Order
- Turn all burner knobs to “off.”
- Close the propane tank valve fully.
- Let the griddle cool slightly before cleaning.
Handle Sugary Sauces Carefully
If cooking with BBQ sauce, teriyaki, or maple syrup, turn off the heat 2–3 minutes early. Sugar burns quickly and can create a sticky, hard-to-remove residue.
Clean While Warm
Cleaning right after cooking, when the griddle is warm but not scorching, makes the job effortless.
Scrape and Steam
Use a metal scraper to push all food debris and grease into the rear grease trap. Spritz water onto the surface to create steam, which lifts stuck-on bits. Never douse with water. This can warp the steel.
Wipe and Oil
Fold paper towels under the scraper or use a heat-resistant cloth (with gloves) to wipe the surface clean. Dry completely, then apply a thin coat of oil to protect the seasoning and prevent rust.
Maintain the Grease Trap
A clean grease trap prevents flare-ups and keeps your workspace safe.
Empty After Every Use
Remove the grease cup while it’s still warm (not hot) and discard contents into a sealed container. Wipe clean with a paper towel. Reinsert fully to avoid leaks.
Never Let It Overflow
An overflowing trap can cause grease fires or damage the frame. Check capacity during long cooks, especially when frying bacon or sausages.
Deep Clean When Needed
Over time, carbon buildup or rust may require a deeper restoration.
Restore a Rusty Surface
- Wet the surface lightly.
- Scrub with a griddle cleaning brick or chainmail sponge in circular motions.
- Scrape off residue.
- Dry thoroughly.
- Re-season immediately.
Avoid Harsh Cleaners
Never use oven cleaner, degreasers, or dish soap after the initial wash. These strip seasoning and expose the metal to rust.
Store with Protection
Proper storage extends your griddle’s life, especially in humid or rainy climates.
Cover Fully
Use a fitted, weather-resistant cover that seals around the legs. Tarp-style covers work but may flap in wind. Ensure the griddle is dry before covering.
Level the Surface
If storing on uneven ground, place thin shims (cardboard or wood) under the legs to keep the griddle level. This ensures proper grease flow and stability.
Avoid Common Mistakes
Even experienced users make preventable errors. Steer clear of these pitfalls:
Don’t Use Soap After First Wash
Soap removes the polymerized oil layer. Stick to water, steam, and scraping for routine cleaning.
Never Deep Fry in Foil Pans
The high heat can ignite flimsy aluminum pans, causing a fire. For frying, use a cast iron skillet on the griddle instead.
Don’t Cook Soups Directly
Liquids will run off into the grease trap. Use a pot or pan placed on the surface to heat soups, stews, or sauces.
Skip the Ignition Delay
Waiting too long to ignite after opening the gas valve risks explosion. Follow the 3–4 second rule every time.
Troubleshoot Common Issues
Even with care, problems can arise. Here’s how to fix them fast.
Fix Sticking Food
- Cause: Poor seasoning or cold surface.
- Solution: Re-season and always preheat. Add oil before cooking.
Remove Rust Spots
- Cause: Moisture exposure.
- Solution: Scrub with a cleaning brick, dry, and re-season.
Stop Flare-Ups
- Cause: Grease buildup or delayed ignition.
- Solution: Clean the grease trap and follow ignition timing.
Correct Uneven Cooking
- Cause: Wind, uneven preheat, or burner issues.
- Solution: Preheat 10–12 minutes. Use wind shields in breezy areas.
Optimize Long-Term Performance
With regular care, your Blackstone griddle can last for years and improve with use.
Re-Season Regularly
Apply a light oil coat before and after each cook. If the surface looks dry or gray, do a full re-season.
Rotate Cooking Zones
Avoid overusing one area. Rotate where you sear and cook to distribute wear evenly.
Use the Right Tools
Stick to metal spatulas, scrapers, and tongs. Avoid plastic or wood near the hot surface.
Frequently Asked Questions About Blackstone Griddles
How long does it take to season a Blackstone griddle?
The full seasoning process takes about 45–60 minutes. You heat the griddle for 10–15 minutes, apply oil, burn it off for 10–12 minutes, and repeat 3–4 times until the surface turns dark and shiny.
Can you use a Blackstone griddle in the rain?
You can use it in light drizzle, but heavy rain creates safety hazards and can cause rust if water pools on the surface. Always dry and oil the griddle immediately after cooking in wet conditions.
What oil is best for seasoning a Blackstone griddle?
High-smoke-point oils work best, including avocado oil, Crisco shortening, or commercial seasoning oils like Lodge Seasoning Oil. These bond well to steel without leaving sticky residues.
How do you remove rust from a Blackstone griddle?
Scrub the rusted area with a griddle cleaning brick or chainmail sponge in circular motions. Wipe clean, dry thoroughly, and apply a fresh coat of seasoning oil immediately to prevent re-rusting.
Is a Blackstone griddle better than a traditional gas grill?
A Blackstone excels at cooking small or delicate foods like eggs, pancakes, and stir-fries that fall through grill grates. Traditional grills are better for smoking and getting char marks on large cuts of meat.
How often should you oil a Blackstone griddle?
Apply a thin oil coat after every cleaning session. Before each cook, a light oil layer also helps maintain the non-stick surface and prevents rust.
Key Takeaways for Mastering Your Blackstone Griddle
Using a Blackstone griddle transforms outdoor cooking into a fast, social, and versatile experience. From pancakes at sunrise to steak dinners at dusk, this appliance handles it all with the right technique. Master the seasoning process, heat zoning, and post-cook clean routine to enjoy a non-stick, rust-free surface for years.
Avoid soap after the initial wash, respect the 3–4 second ignition timing, and always oil the surface after cleaning. Now that you know how to use a Blackstone grill the right way, fire it up and start cooking everything outside.