How to Measure for a Grill Cover
Is your grill slowly rusting under the patio awning? Rain, snow, dust, and harsh sunlight can destroy even the most expensive grills in just a few seasons. The problem usually isn’t the cover itself—it’s the fit. A cover that’s too small exposes critical parts, while one that’s too tight traps moisture and breeds mildew. The fix is simple: measure your grill correctly before you buy.
This guide walks you through the exact process for measuring a grill for a cover, including width, depth, and height. You’ll learn how to account for handles, knobs, shelves, and wheels, plus which materials hold up best in different climates. Whether you own a cart-style gas grill, a built-in island unit, or a classic charcoal kettle, you’ll know precisely how to find (or build) the right cover.
Measure Width at the Widest Point
Include Side Shelves and Handles
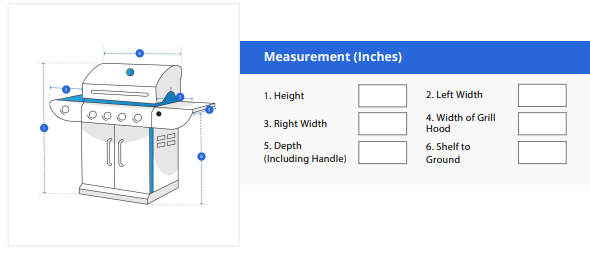
Width is the left-to-right span of your grill, and it’s the dimension most cover manufacturers use to categorize their products. Start with the lid closed and stretch a tape measure from the farthest point on one side to the farthest point on the other.
Don’t stop at the main body. Include side shelves, side burners, rotisserie arms, and any permanent attachments. If your shelves fold down, decide now whether you’ll store them up or down, then measure accordingly. Stay consistent with that choice.
For kettle grills, measure the diameter at the widest part of the body. For built-in grills, measure the insert only if it’s recessed into a counter, or the full outer frame if it’s a standalone built-in unit.
Pro Tip: Round up to the nearest inch. A 44.5″ grill needs a 45″ cover.
Measure Depth from Front to Back

Account for Knobs and Front Protrusions
Depth runs from the back of the grill to the very front. This ensures the cover fully encloses the control panel area, which is often the most exposed part of the grill.
Many buyers overlook control knobs, thermometer stems, and front handles, ending up with a cover that’s too short. Even a 2-inch protrusion can leave the face of your grill exposed to rain.
Place the tape measure at the rear panel or exhaust vent and extend it straight forward to the outermost point at the front. For built-in models, measure from the back of the insert to the front edge of the frame.
Warning: A cover that ends before the knobs can tear when pulled on, especially in windy conditions.
Measure Height from the Ground Up
Capture the Lid Handle and Wheels
Height runs from the ground (or base) to the highest point of the grill with the lid closed. This is usually the top of the lid handle, not the hood itself.
Include wheels or legs in your starting point. Ideally, the cover should reach at least the top of the wheels to protect the lower frame from splashback and debris. However, avoid covers so long they drag on the ground, which creates tripping hazards and premature wear.
If your grill has a side cart or storage compartment, account for any upward extensions like tool hooks or bottle openers.
Visual Cue: Stand back and identify the tallest part. Don’t assume it’s the center of the lid.
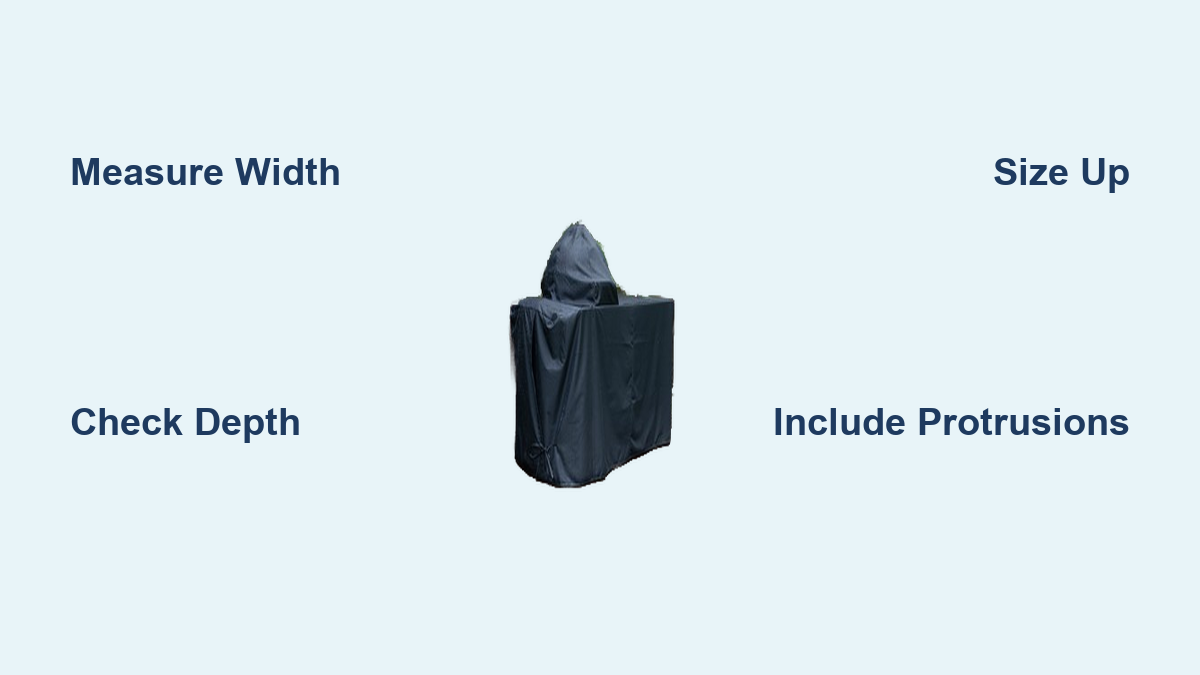
Choose the Right Size: Always Size Up
Why Bigger Is Better
Once you have your dimensions, compare them to available cover sizes. If your grill measures 44″ wide, 24″ deep, and 46″ tall, look for a cover labeled 45″ x 25″ x 48″.
Always choose the next size up if your measurements fall between options. A slightly larger cover offers two key benefits:
- Full coverage with no exposed knobs, handles, or shelves
- Better airflow that allows moisture to escape, reducing mildew and condensation
Risks of a Too-Small Cover
- Exposes grill components to rain and UV damage
- Stretches material and weakens seams
- Difficult to install and remove
- Can tear during windy conditions
Risks of a Too-Large Cover
- May drag on wet surfaces and absorb moisture
- Can flap in wind unless secured
- Less aesthetic, but still functional
Expert Note: Use drawstrings, Velcro straps, or grommets to tighten oversized covers at the base and prevent wind lift.
Grill-Type Specific Measuring Tips
Cart Grills: Measure the Full Unit
Most gas grills on wheels fall into this category. These often include side shelves, storage bins, and lower racks.
- Measure the entire cart, not just the main grill body
- Include fold-down shelves in your width if used in the up position
- Standard sizes:
- 36″ grill → ~36″L × 26″D × 46″H
- 45″ grill → ~45″L × 24″D × 40″H
- 56″ grill → ~56″L × 25″D × 46″H
- 67″+ grill → ~67″L × 26″D × 48″H
Common Mistake: Measuring only the burners and ignoring the cart frame.
Built-In Grills: Insert or Full Frame?
Built-in grills sit inside outdoor kitchen cabinets. Covers can be for the grill insert only or the entire unit.
- If the grill is flush within a countertop, measure the insert dimensions
- If the base and frame are exposed, measure the full outer width, depth, and height
- Common insert sizes: 30″, 33″, 36″, 45″, and 56″ wide, with depths around 30″ and heights near 16″
Side Burners often need separate covers. Standard sizes include 19.5″W × 33.5″D and 13.75″W × 24″D.
Pro Tip: Take photos of your setup before shopping. It helps when comparing options online.
Kettle Grills: Diameter and Height
Round charcoal grills require different math. Instead of length and width, measure the diameter.
- Measure across the widest part of the body, including the lid handle if it extends outward
- A standard 30″ kettle grill typically needs a 30″ diameter × 26″ height cover
Caution: Some covers list “fit” sizes rather than actual dimensions. Always verify with your own measurements.
Pick the Best Cover Material
Match Fabric to Your Climate
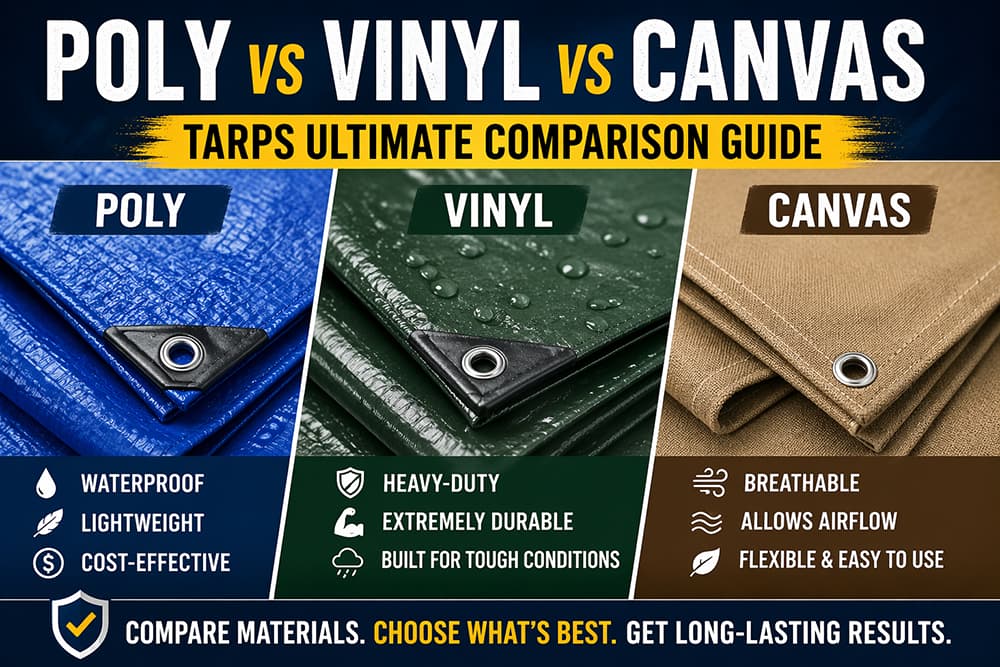
Even a perfect fit fails if the material can’t handle your weather. Choose based on local conditions:
- Canvas: Durable and breathable, great for dry climates
- Polyester: Lightweight, UV-resistant, often water-repellent
- Nylon: Strong and flexible, resists abrasion
- Vinyl or PVC-Coated Polyester: Marine-grade protection, best for rainy, snowy, or coastal areas
Avoid thin, flimsy covers sold at big-box stores. They may last only one season.
Look for Quality Construction
A well-made cover lasts for years. Check for these features:
- Reinforced seams: Double-stitched or zigzag stitching prevents splitting
- Finished edges: Serged or pinked edges resist fraying
- Ventilation grommets: Allow airflow to reduce moisture
- Security features: Drawstrings, Velcro flaps, or grommets for tie-downs
Brand-Specific Covers: Weber, Napoleon, and Char-Broil offer custom-fit options that match grill contours precisely.
Make a DIY Cover as a Last Resort
When Commercial Options Fall Short
If your grill is vintage, oversized, or uniquely configured, a custom DIY cover may be your best option.
Materials You’ll Need
- Marine-grade fabric (PVC-coated polyester or vinyl)
- Heavy-duty thread
- Heavy-duty sewing machine or professional tailor
- Measuring tape, fabric marker, scissors
- Optional: Velcro, drawstring, grommets
Steps to Build
- Add 1–2 inches to each dimension for seam allowance
- Sketch panels: front, back, two sides, and a top (if separate)
- Cut fabric using your measurements
- Sew panels with reinforced seams (double-stitch)
- Finish edges to prevent fraying
- Add drawstring casing at the bottom for tightening
- Install grommets at corners for wind anchoring
Ventilation Hack: Add a small gusset or raised center panel to create air space above the grill.
Avoid Common Measuring Mistakes
Fix These Before You Buy
| Mistake | Solution |
|---|---|
| Measured only the main body | Include shelves, handles, and knobs |
| Ignored lid handle height | Measure to the tallest point |
| Measured with shelves in different positions | Decide storage position first |
| Used an old or torn tape measure | Replace for accuracy |
| Bought an exact match without rounding up | Size up for better fit and airflow |
Final Check: Walk around the grill with the tape measure. Don’t assume symmetry.
Troubleshoot Common Cover Problems
Fix Fit and Function Issues
Problem: Cover doesn’t reach the front knobs
→ Re-measure depth and size up to the next available cover.
Problem: Mildew inside the cover
→ The grill wasn’t cool or dry before covering. Also, the cover may be too tight. Size up for airflow.
Problem: Cover flaps in wind
→ Use a drawstring to tighten the bottom. Add rope through grommets anchored to legs or a wall.
Problem: Cover drags on the ground
→ Choose a shorter height or use straps to lift the hem.
Problem: Tears at seams
→ Upgrade to marine-grade fabric with double-stitched seams.
Frequently Asked Questions About Measuring for a Grill Cover
Should I measure my grill with the lid open or closed?
Always measure with the lid closed. This simulates how the cover will actually fit and ensures the top dimensions are accurate.
How much extra room should I add to my measurements?
Round up to the nearest inch for each dimension. If your grill is 44.5″ wide, choose a 45″ cover. This small buffer improves airflow and prevents stretching.
Do I need to include side shelves in my width measurement?
Yes, if you plan to store the grill with shelves up. If you fold them down, measure accordingly, but stay consistent with that choice.
What if my grill measurements fall between two cover sizes?
Always size up. A larger cover provides full coverage and better ventilation, which reduces moisture buildup and mildew.
Can I use a universal cover for any grill type?
Universal covers work for many cart-style grills, but built-in and kettle grills often need specific shapes. Check the manufacturer’s sizing chart before buying.
How do I keep my grill cover from blowing off in wind?
Use drawstrings, Velcro straps, or grommets to secure the cover. For extra protection, anchor the corners with bungee cords or rope tied to the grill legs.
Final Checklist Before Buying
- Width measured at widest point (including shelves)
- Depth includes front knobs and handles
- Height reaches top of lid handle
- Wheels included in base measurement
- Rounded up to the nearest inch
- Chose larger size if between options
- Material suits local weather (vinyl for wet climates)
- Cover has securing features (drawstring, Velcro, grommets)
Key Takeaways for Measuring Your Grill Cover
Measuring for a grill cover is straightforward once you know the three core dimensions: width, depth, and height. Include every protrusion, from side shelves to control knobs, and always round up to the nearest inch. When in doubt, size up. A slightly larger cover protects better and breathes better, keeping your grill safe from rust, mildew, and weather damage for years to come.