How to Use a Grill Pan: Quick Steps
Craving that smoky, charred flavor without firing up an outdoor grill? A grill pan brings restaurant-quality searing straight to your stovetop, any time of year. From juicy steaks to caramelized vegetables, learning how to use a grill pan transforms weeknight dinners into bold, flavorful meals. This guide covers everything you need: choosing the right pan, mastering preheating, nailing cook times for different foods, and keeping your pan in top shape for years of delicious results.
Choose the Right Grill Pan

Your pan choice sets the stage for every meal you grill indoors. Material, size, and design all affect heat retention, flavor, and ease of use.
Cast Iron vs Non-Stick Performance
Cast iron delivers unbeatable heat retention and creates deep, caramelized sear marks. Over time, it develops a natural patina that boosts flavor and improves food release. The trade-off? It’s heavy and needs seasoning to prevent rust.
Non-stick pans are lighter, easier to clean, and perfect for delicate foods like fish fillets or scallops. However, they can’t handle the extreme heat needed for thick steaks, and metal utensils will damage the coating.
Size and Burner Compatibility
Large rectangular pans (32–35 cm) work well for family meals but often span two burners. Always center them across two equal-sized burners for even heating. Smaller square pans (26 cm) suit single portions or compact stoves.
Multi-Functional Options
Reversible grill/griddle pans give you two surfaces in one. Use the ribbed side for grill marks and fat drainage, and the flat side for pancakes or eggs. Standard skillets lack ridges, so they won’t deliver authentic char or drainage.
Prep Food and Pan Correctly
A little prep work prevents sticking and ensures even cooking with maximum flavor.
Bring Food to Room Temperature
Pull meat, poultry, or fish from the fridge 20–30 minutes before cooking. Cold food drops the pan’s temperature and leads to uneven sears. Room-temperature ingredients brown more evenly and develop better crusts.
Dry and Oil the Food
Pat food thoroughly with paper towels. Moisture creates steam, which blocks browning. Brush with a high-smoke point oil like canola, vegetable, or grapeseed. Olive oil works for brushing but has a lower smoke point. Season with salt and pepper right before grilling.
Manage Marinades Carefully
Wipe off excess herbs, garlic, or thick marinade before placing food on the pan. These bits burn fast, creating acrid smoke and bitter taste. The flavor stays infused from the marinating time, so you don’t lose anything by cleaning the surface.
Preheat the Pan Thoroughly
Proper preheating is the single most important step for preventing sticking and achieving a great sear.
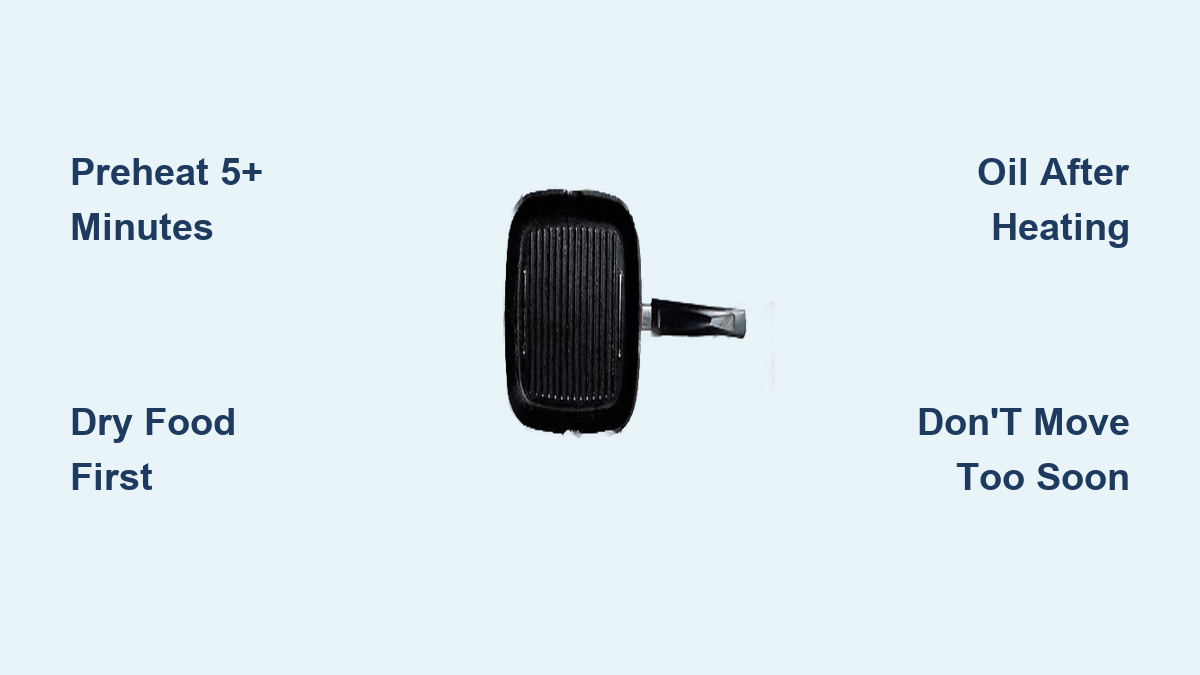
Heat for 5+ Minutes on Medium-High
Place the empty grill pan on medium-high heat. Allow at least 5 minutes for the surface to reach consistent temperature, especially with cast iron. Both ridges and valleys need full heat for uniform grill marks.
Test with the Water Droplet Method
Flick a few cold water droplets onto the pan:
– Ready: Water sizzles, dances, and evaporates instantly.
– Not Ready: Water sits or boils slowly. Keep heating.
Oil After Preheating
Use tongs to hold an oiled paper towel and rub it across the hot ridges. This thin layer prevents sticking without pooling oil. Reduce heat to medium after oiling to avoid burning, especially with non-stick pans.
Grill with Precision

Good technique makes the difference between a mediocre sear and a perfect one.
Space Items Properly
Leave about ½ inch (1.3 cm) between pieces. Overcrowding drops the pan temperature, steams the food, and prevents proper charring. Cook in batches when needed.
Don’t Move Too Soon
Once food hits the pan, leave it alone. Let it sear until it releases naturally. Forcing it early causes tearing and sticking. Watch for visual cues: browned edges and a formed crust signal it’s ready to flip.
Flip Once with the Right Tool
Use tongs for chicken, steak, or vegetables. Use a spatula for burgers or fragile fish. Flip only once. Repeated turning disrupts sear formation and can break delicate proteins.
Cook Different Foods Right
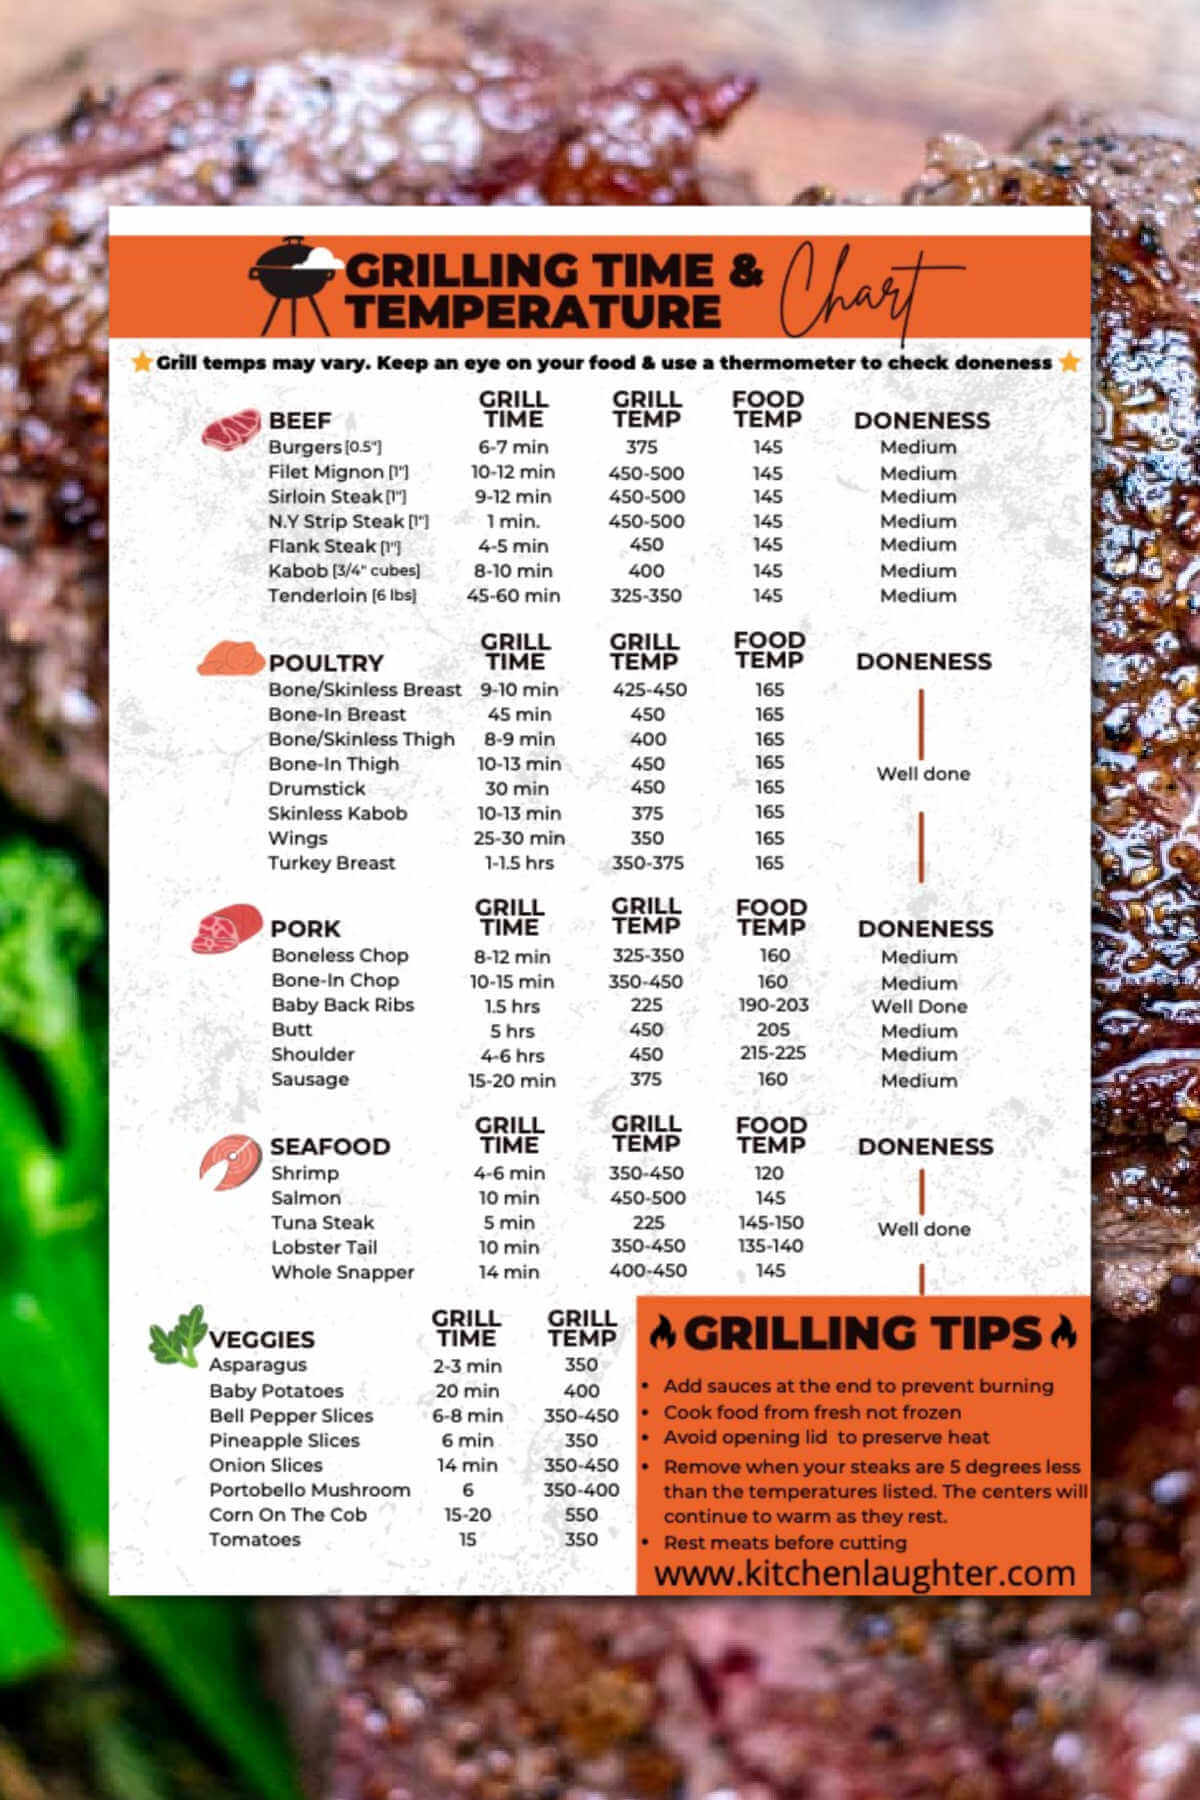
Each food has its own timing and handling needs. Here’s how to get the best results.
Chicken Breasts: 5–6 Minutes Per Side
Place boneless breasts on the hot pan. Sear 5–6 minutes undisturbed, then flip and cook until the internal temperature hits 165°F (74°C). Rest 3–5 minutes before slicing to lock in juices.
Burgers: 4 Minutes Then Flip
Press patties gently without overhandling. Sear 4 minutes on the first side, then flip. Cook beef burgers 4–6 minutes more depending on thickness and doneness. Turkey burgers need an extra 2–3 minutes to reach safe temperatures. Add cheese and cover with an overturned bowl to melt quickly.
Steak: Sear Then Rest
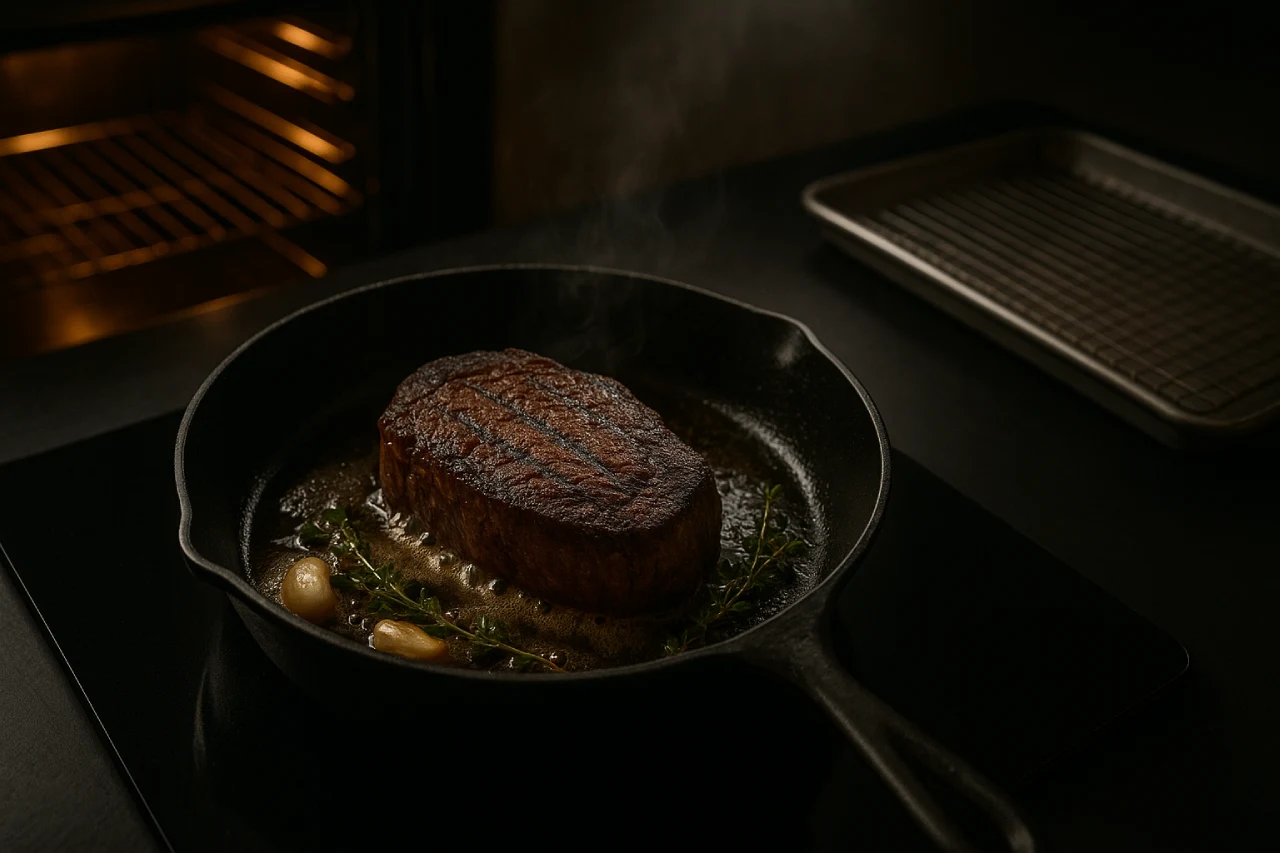
Sear 3–4 minutes per side. For medium-rare, cook 3 minutes after flipping. For medium or well-done, add 2–3 minutes per side. Rest 5 minutes before slicing. This step keeps the meat juicy.
Vegetables: Even Chunks, Light Oil
Cut vegetables into uniform pieces. Thread small items onto skewers so they don’t fall through the ridges. Lightly oil and season. Cook until tender and charred:
– Bell peppers: 4–5 minutes per side
– Asparagus: 5–10 minutes total
– Zucchini, eggplant, corn: All grill beautifully
Fruit: Caramelize Without Burning
High sugar means quick browning. Grill large pieces for 3–5 minutes per side. Pineapple, peach, and pear halves work beautifully. Banana halves and romaine lettuce add sweet or smoky notes to desserts and salads.
Seafood: Handle Gently
Scallops sear in 2–3 minutes per side for a golden crust. Fish fillets work best on non-stick pans. Cook skin-side down first, then flip carefully when edges turn opaque.
Finish Like a Pro
A few advanced techniques take your results from good to great.
Finish Thick Cuts in the Oven
For steaks over 1 inch thick, sear on the stove, then transfer the oven-safe pan to a preheated 375°F (190°C) oven. Cook 5–10 minutes more to reach desired doneness without burning the outside.
Melt Cheese Under a Bowl
Place cheese on burgers and cover with an overturned heat-proof bowl. Trapped heat melts cheese in under a minute without needing a lid.
Clean and Maintain Properly
Good care extends your pan’s life and keeps performance consistent.
Cool Before Cleaning
Never plunge a hot pan into cold water. Thermal shock can warp cast iron or damage non-stick coatings. Let the pan cool slightly, then clean while still warm for easier residue removal.
Scrub Ridges with a Grill Brush
Use a stiff nylon brush or crumpled aluminum foil to clean the grooves under hot running water. This lifts burned bits and grease. Avoid steel wool on non-stick surfaces.
Care for Cast Iron Pans
Prevent Rust and Build Patina
After washing, dry immediately with a towel. While still warm, rub a light coat of oil (canola or vegetable) over the surface. This maintains the natural patina, enhances non-stick properties, and prevents rust.
Skip the Dish Soap (Usually)
Traditional cast iron should avoid soap, which strips seasoning. Modern enameled versions handle mild detergent better, but hand washing is still the safest choice.
Protect Non-Stick Surfaces
Use Soft Tools Only
Clean with soft sponges or nylon brushes. Never use metal scrapers. Store with a cloth between stacked pans to prevent scratches.
Avoid High-Heat Cleaning
Don’t preheat an empty non-stick pan or blast it with cold water right after cooking. Sudden temperature shifts degrade the coating.
Troubleshoot Common Problems
Food Sticking? Check Heat and Dryness
Sticking usually means the pan wasn’t hot enough, the food was wet, or you flipped too early. Preheat longer, dry food thoroughly, and wait for natural release.
Uneven Cooking? Avoid Overcrowding
Too many items lower the pan temperature and cause steaming. Leave space between pieces and use dual burners for large pans.
Too Much Smoke? Watch Oil and Residue
Smoke comes from low-smoke point oils, burnt marinade bits, or excessive heat. Switch to high-smoke point oils, wipe marinade off before cooking, lower the heat, and turn on the range hood.
No Grill Marks? Heat and Pan Issues
Flat pans don’t mark, and weak heat prevents searing. Use a ribbed grill pan, preheat fully, and don’t move food too soon.
Stay Safe While Grilling Indoors
Use Oven Mitts and Tongs
Handles get extremely hot. Always protect your hands when handling the pan or oiling it.
Ventilate the Kitchen
Turn on the exhaust fan or open windows. Indoor grilling produces smoke, and good ventilation keeps the air clean.
Check Internal Temperatures
Use an instant-read thermometer for accuracy:
– Poultry: 165°F (74°C)
– Ground meats: 160°F (71°C)
– Steak (medium-rare): 130–135°F (54–57°C)
Ensure Pan Stability
Place the grill pan flat on the burner. A wobbly pan risks spills, especially with fatty cuts that release grease.
Maximize Year-Round Use
Summer Shortcut
Skip the hot BBQ and grill veggies, salmon, or burgers indoors with less cleanup.
Winter Warm-Up
Recreate summer cookouts in cold months. Grilled lamb chops, steak, or marinated peppers with garlic toast bring comfort to any winter night.
Try These Recipe Ideas
Meat & Seafood
- Chipotle salmon: Marinate, wipe excess, grill skin-down first.
- Garlic-rosemary lamb chops: Sear 20–25 minutes total.
- Ribeye steaks: Sear, oven-finish, rest, and slice.
Vegetables & Sides
- Grilled romaine: Halve, oil, and grill 2–3 minutes. Top with vinaigrette.
- Corn ribs with pico de gallo: Grill, slice, and serve with fresh salsa.
- Marinated peppers on toast: Sweet, smoky, and satisfying.
Desserts & Breakfast
- Grilled peaches with ricotta: Caramelize, then top with cheese and honey.
- French toast: Soak bread in custard and grill on low for texture and marks.
Frequently Asked Questions About Grill Pan Cooking
Do I need to season a grill pan?
Cast iron pans benefit from seasoning to build a natural non-stick patina and prevent rust. Apply a thin layer of oil after each cleaning. Non-stick pans come pre-seasoned and don’t need this step.
How do I prevent food from sticking to my grill pan?
Preheat the pan thoroughly (at least 5 minutes), pat food dry, and oil both the pan and the food. Wait for the food to release naturally before flipping. The water droplet test confirms proper heat.
Can I use a grill pan on an induction cooktop?
Yes, as long as the pan’s base is magnetic. Cast iron works perfectly on induction. Check the manufacturer’s specifications for non-stick pans to confirm compatibility.
What’s the best oil for grilling on a grill pan?
Use high-smoke point oils like canola, vegetable, or grapeseed. These withstand high heat without burning. Olive oil has a lower smoke point and can create smoke or off-flavors at high temperatures.
How do I get perfect grill marks?
Use a ribbed grill pan, preheat fully, and place food on the ridges without moving it. The contact points char while the rest of the surface browns through indirect heat. Proper preheat and patience are key.
Is grilling on a grill pan healthy?
Grill pan cooking allows fat to drain away from food through the ridges, similar to outdoor grilling. It requires minimal added oil and preserves nutrients, making it a healthy cooking method overall.
Key Takeaways for Mastering Your Grill Pan
Learning how to use a grill pan comes down to three essentials: choose the right material for your cooking style, preheat thoroughly before adding food, and resist the urge to flip too early. These habits, combined with proper cleaning and care, deliver bold flavor and perfect sear marks every time.
Start with a simple recipe like grilled chicken breasts or vegetables to build confidence. As you get comfortable, experiment with steak, seafood, and even fruit. With consistent technique, your grill pan becomes a year-round kitchen workhorse, bringing outdoor flavor to every meal.