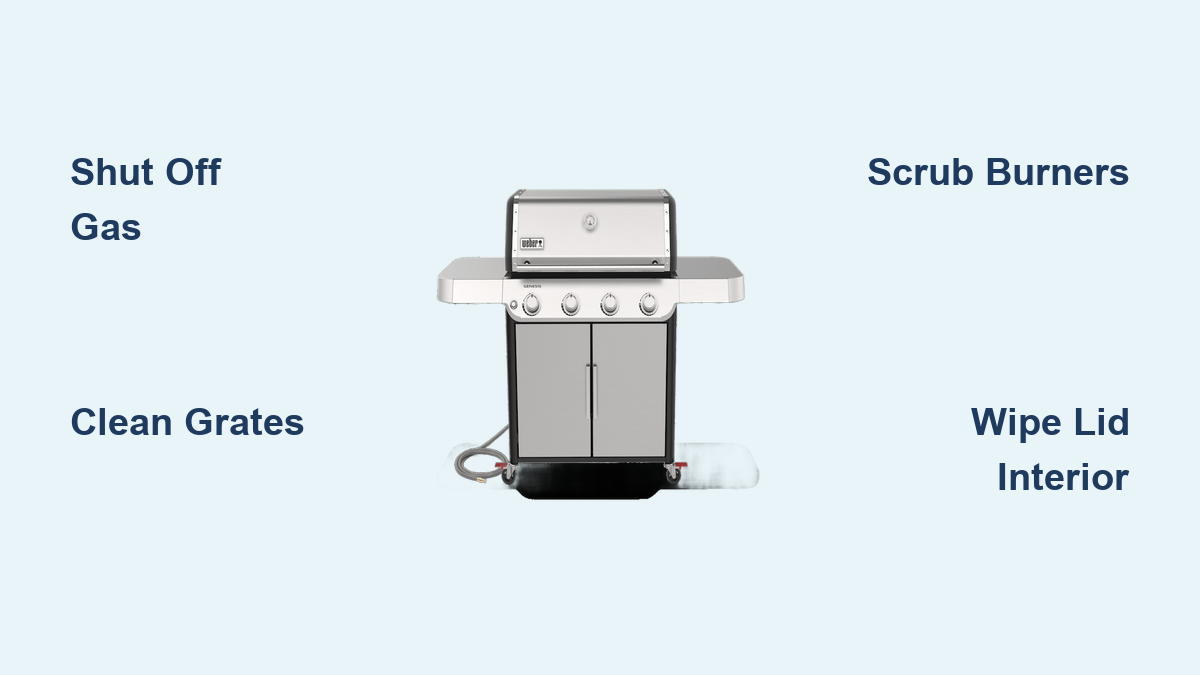
How to Clean a Weber Genesis Grill
Nothing ruins a backyard barbecue faster than a dirty grill. Sticky grates, uneven flames, and unexpected flare-ups are all signs your Weber Genesis needs a deep clean. Knowing how to clean a Weber Genesis grill properly isn’t just about appearances; it’s essential for safety, flavor, and long-term performance. Whether you’ve owned your grill for years or just fired it up for the first time this season, a thorough cleaning restores peak cooking efficiency and prevents costly damage.
Most users underestimate how much grease and carbon build-up inside the cookbox affects heat distribution and taste. Left unchecked, this residue leads to dangerous flare-ups and off-flavors in your food. But with the right approach, starting from the inside out, you can complete a full deep clean in under three hours. Follow this step-by-step process to ensure your grill heats evenly, lights reliably, and delivers perfect sear marks every time.
Safety First: Prepare for Cleaning
Before touching any part of your Weber Genesis, safety must come first. A poorly prepared cleaning session can lead to gas leaks, electrical shorts, or personal injury. Always begin with a completely cold grill. Never attempt to clean hot components, because residual heat can turn soapy water into steam burns or ignite grease.
Shut Off Gas Supply Completely
For propane models, turn the tank valve clockwise until it’s fully closed, then disconnect the tank. For natural gas units, shut off the supply at the wall valve. This eliminates the risk of accidental ignition during cleaning, especially when working near the burners and ignition system. Double-check that no gas odor remains before proceeding.
Gather Protective Gear and Tools
Wear rubber gloves and old clothes, since you’ll be handling greasy, carbon-coated parts. Lay down newspaper or a drop cloth under the grill to catch debris and simplify cleanup. Expect that brushes and sponges may become too soiled to reuse, so treat them as disposable if needed.
Interior Cleaning: Start from the Top
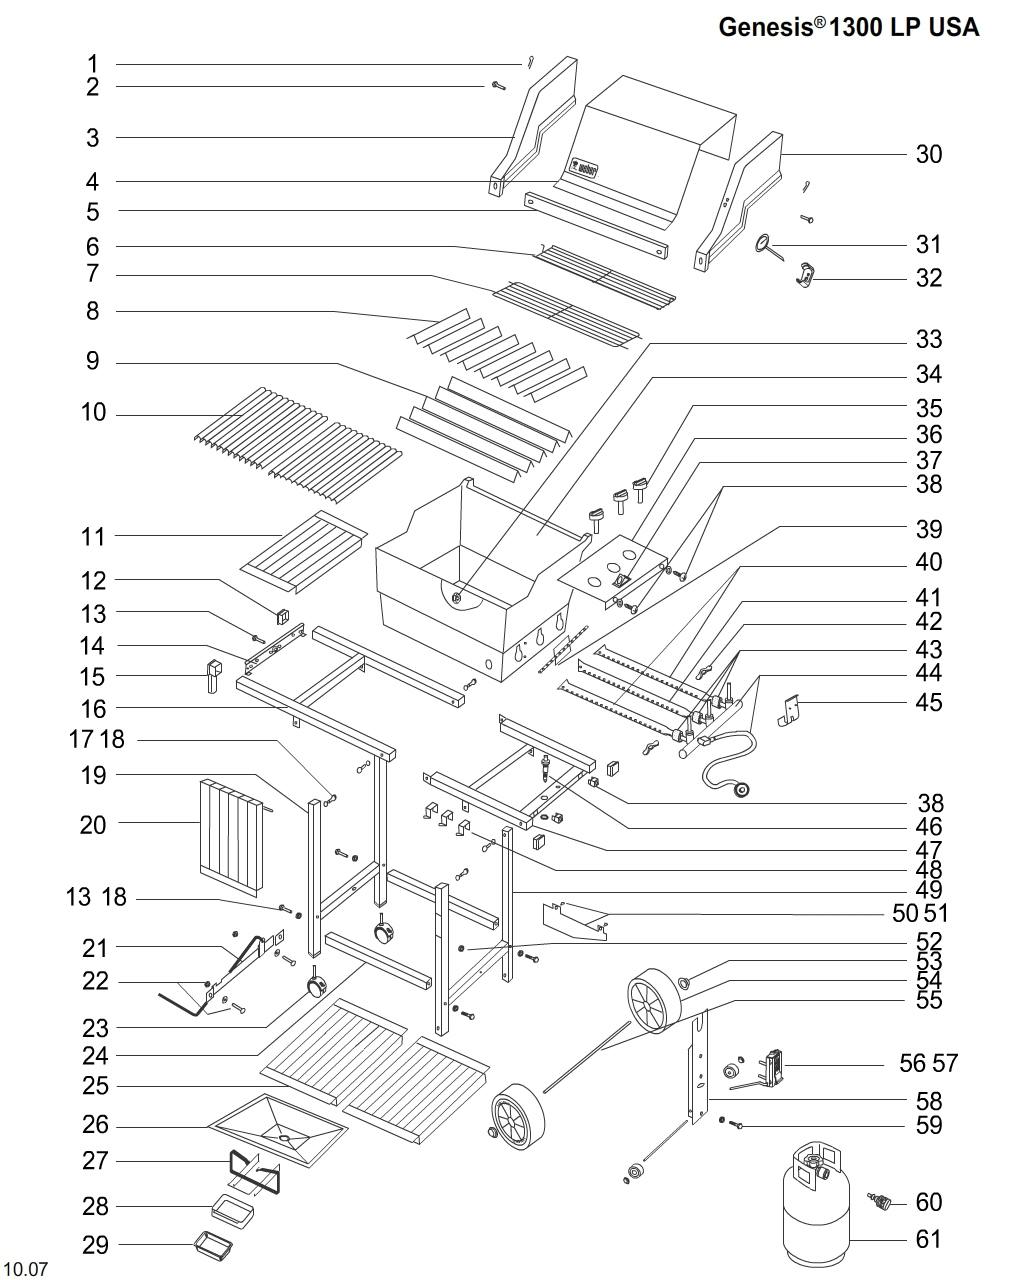
Clean the interior before the exterior. Doing it in reverse means soapy runoff and falling debris will dirty your freshly wiped surfaces. Begin at the top and work down through the cooking system to maintain efficiency and avoid rework.
Clean Lid Interior Thoroughly

The inside of the lid often accumulates black, flaky carbon, not peeling paint. While harmless, it can fall onto food during cooking.
Use a stainless steel grill brush to scrub the entire interior surface. For stubborn build-up, dampen a sponge with dish soap and gently scrub with fine steel wool. Avoid abrasive pads that could damage the finish.
Pro Tip: Wipe the lid with a dry paper towel while it’s still warm (but not hot) after each cook. This simple habit drastically reduces carbon buildup over time.
Refresh Cooking Grates Effectively
Clean grates ensure better searing and less sticking.
Start by scrubbing in place with a stainless steel brush while the grates are cool. Then, remove them and inspect for heavy grease or carbon. Soak in warm, soapy water if needed.
For deep cleaning, use soapy steel wool and scrub both sides. When cleaning the underside, keep the steel wool slightly dry to prevent water from dripping onto burners below. Rinse and dry completely before reinstalling to prevent rust.
Warning: Never use oven cleaner or harsh chemicals, as these can damage the grate coating and leave toxic residues.
Remove and Clean Flavorizer Bars
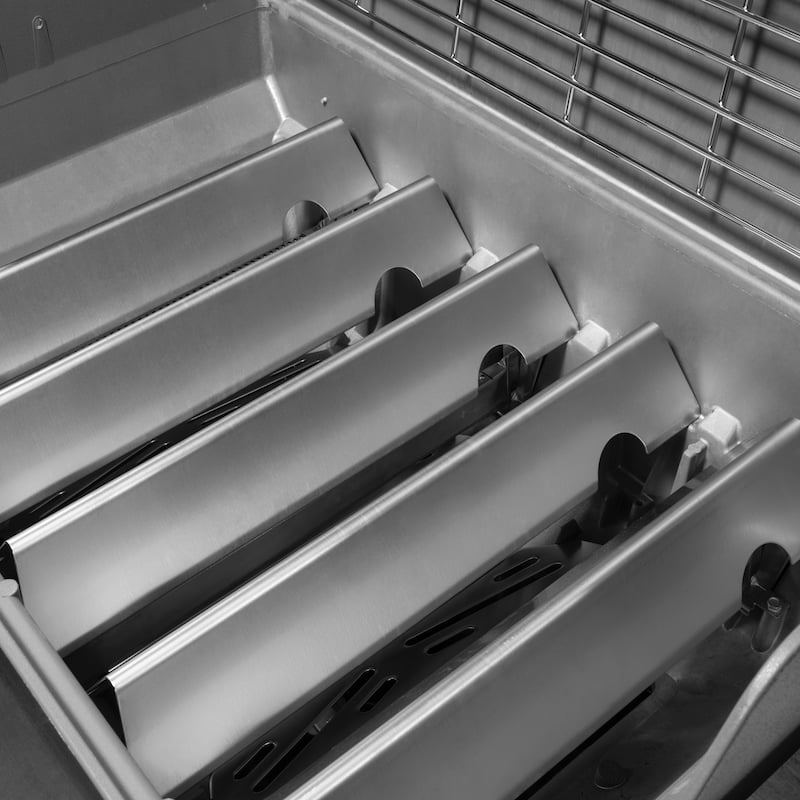
These components catch drippings, create smoke flavor, and protect burners from grease.
Lift them out carefully and scrape off heavy buildup with a cookbox scraper. Then, scrub with a grill brush or soapy steel wool. Some rust is normal and doesn’t compromise function unless the metal is thin or crumbling.
Note: Pay attention to their orientation before removal. Reinstalling them backward can disrupt heat flow and increase flare-ups.
Maintain Burner System Precision
The burners are critical for even heating and safe ignition.
Inspect the small ports along the top of each burner. Use a clean stainless steel brush and scrub across the holes (perpendicular to the row), not along them. Brushing lengthwise can force debris deeper into the tubes.
Avoid the ignition electrode, because it’s fragile. Gently brush around it, never directly on it. If the electrode is bent or coated in grease, carefully clean with a dry cloth.
Clear Spider Screens Safely
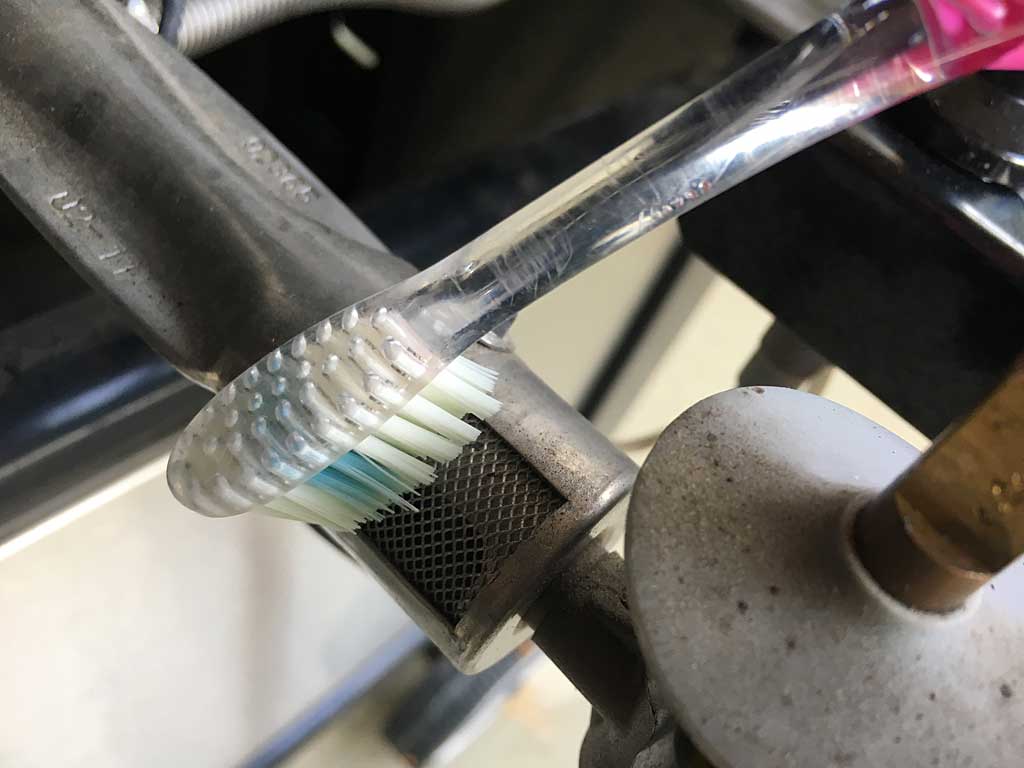
A common cause of ignition failure and flare-ups is clogged spider screens, which are small mesh filters under the control panel where gas lines connect to burners.
Use a soft-bristled brush (like an old toothbrush) to gently remove nests or debris. Do not poke with wires or sharp tools, since this can damage the screen and allow pests deeper access.
Fact: Over 60% of “burner won’t light” issues are due to blocked spider screens, not faulty igniters.
Scrape and Wash Cookbox Floor
The cookbox collects ash, grease, and food particles that cause uneven heating and smoke flare-ups.
Use a cookbox scraper to push debris toward the front opening. Work from back to front and side to side until the floor is clear.
Once loose material is removed, wipe down with a damp cloth. Avoid soaking, because water can damage internal components.
Empty and Clean Grease Management System
Slide out the grease tray and catch pan. Scrape solidified grease into a trash bag using a putty knife or scraper.
Remove the disposable drip pan and discard. During a deep clean, expect to replace it multiple times as debris falls from above.
Wash the metal tray and catch pan in warm, soapy water, rinse, and dry thoroughly before reinserting.
Key Point: Replace the drip pan only after the entire cleaning process is complete. Otherwise, you’ll just fill a new one with falling debris.
Exterior Restoration: Match Finish to Cleaner
Cleaning the outside last prevents re-soiling from interior runoff. Use the correct products based on your Genesis model’s finish, whether stainless steel, painted enamel, or plastic.
Wash Stainless Steel Correctly
Stainless steel requires special care to preserve its grain and prevent scratches.
Wipe loose dirt with a dry microfiber cloth first. Then, apply a non-abrasive stainless steel cleaner or Bar Keepers Friend with a soft cloth.
Always wipe in the direction of the grain. Going against it causes fine scratches that trap grime.
Rinse with clean water and dry immediately with a microfiber towel to prevent water spots.
For added protection, apply a stainless steel protectant (like Weber’s own formula) to repel fingerprints and moisture.
Never use: Paper towels, steel wool, or abrasive cleaners, since they will scratch and dull the surface.
Clean Painted and Enamelled Surfaces Gently
Black painted cabinets and porcelain-enameled lids are more delicate than stainless steel.
Use warm, soapy water and a soft sponge or microfiber rag. For stubborn grease, Simple Green works well without damaging the finish.
Avoid aggressive scrubbing. If using steel wool (with soap) to restore shine on dull black enamel, test on a hidden area first, because it can scratch.
Rinse thoroughly and dry immediately to prevent mineral deposits.
Wipe Down Doors and Shelves
Don’t forget the cabinet doors beneath the cookbox.
For stainless steel doors, follow the same grain-aligned method as the lid. For painted doors, use Simple Green and a soft cloth.
Clean side shelves thoroughly, since these collect grease splatter and food residue. Use soapy water or Simple Green, then dry.
Handle Special Conditions and Environments
Grill maintenance needs vary by location. If you live near the coast or a pool, your cleaning routine must adapt.
Protect Against Salt and Chlorine
Saltwater and chlorine accelerate corrosion, especially on stainless steel.
Wash the exterior more frequently, every few weeks instead of twice a year. Use warm soapy water, rinse well, and dry completely.
Always cover your grill with a premium Weber cover when not in use. This is non-negotiable in coastal or poolside environments.
Manage Rust and Wear Proactively
Some rust on flavorizer bars is normal and safe if the metal isn’t compromised. Replace them if they’re thin, cracked, or crumbling.
For external rust, address it immediately. Light surface rust on stainless steel can often be cleaned with Bar Keepers Friend. If it pits or spreads, consider professional refinishing or part replacement.
Inspect knobs, igniter, and grates during each cleaning. Replace worn parts before they fail mid-cook.
Final Checks and Performance Testing
After reassembly, verify everything works before your next barbecue.
Reassemble in Correct Order
Ensure heat deflectors are reinstalled in the right orientation, since this affects heat distribution. Confirm flavorizer bars are positioned to shield burners.
Double-check that grates are seated properly and burners are aligned with gas tubes.
Make sure the ignition electrode is intact and not bent into contact with the burner.
Test Ignition and Flame Pattern
Reconnect the gas and turn on the supply. Light each burner.
Observe the flame: it should be blue with small yellow tips, even along the entire length. Yellow, flickering, or spotty flames indicate clogged ports or spider screens, so repeat cleaning if needed.
Confirm Even Heating
Close the lid and let the grill heat for 10–15 minutes. Open and check for consistent heat across the grates. Cold spots mean burner ports are still blocked.
Maintenance Schedule and Prevention Tips
Keep your Weber Genesis performing like new with smart habits.
Follow a Cleaning Frequency Plan
- After every cook: Brush grates and wipe lid interior while warm.
- Monthly: Check spider screens and grease tray.
- Twice a year: Full deep clean (spring and fall).
- High-use or harsh environments: Clean every 3 months.
Extend Grill Life with Simple Habits
- Always cover the grill when not in use.
- Never use oven cleaner or bleach-based products.
- Replace drip pans regularly, and don’t let grease accumulate.
- Store in a dry, sheltered area if possible.
Know When to Replace Parts
Weber parts are designed for longevity, but wear happens. Replace:
– Grates if coating is peeling or warped.
– Flavorizer bars if more than 30% is rusted through.
– Igniter or knobs if cracked or unresponsive.
– Drip pans after every deep clean.
Frequently Asked Questions About Cleaning a Weber Genesis Grill
How often should I deep clean my Weber Genesis grill?
Perform a full deep clean at least twice a year, ideally in spring and fall. If you grill frequently or live in a coastal or poolside environment, clean every three months. Wipe the lid interior and brush grates after every cook to prevent heavy buildup.
Can I use oven cleaner on my Weber Genesis grates?
No, never use oven cleaner or harsh chemicals on grates. These products can damage the grate coating and leave toxic residues that transfer to food during cooking. Use mild dish soap, stainless steel brushes, or soapy steel wool instead.
What causes yellow flames on my Weber Genesis burner?
Yellow, flickering, or spotty flames usually indicate clogged burner ports or spider screens. Brush across the burner ports (not lengthwise) and gently clean spider screens under the control panel with a soft brush. Repeat the cleaning process if flames remain uneven.
Is rust on flavorizer bars dangerous?
Some rust on flavorizer bars is normal and safe if the metal retains its structural integrity. Replace bars only if they are thin, cracked, or crumbling. Light surface rust does not compromise function and can often be scrubbed clean.
What’s the best cleaner for stainless steel Weber Genesis parts?
Bar Keepers Friend is highly effective for stainless steel surfaces. Apply it with a soft cloth and always wipe in the direction of the grain. Avoid paper towels, steel wool, and abrasive cleaners that scratch and dull the finish.
Do I need to remove gas tubes to clean my Weber Genesis?
No, gas tubes inside the grill do not need to be removed for routine cleaning. Leaving them in place minimizes the risk of improper reassembly. Simply clean around them and brush the burner ports and spider screens carefully.
Key Takeaways for Cleaning Your Weber Genesis Grill
Cleaning your Weber Genesis grill doesn’t have to be daunting. By following this inside-first method with the right tools and cleaners, you’ll ensure safer cooks, better-tasting food, and a grill that lasts for years. Whether you own a Genesis E-310 or a 20-year-old model, this routine keeps performance high and repairs rare.
Remember these critical points: always start with a cold grill and gas supply shut off, clean interior components top-down before touching the exterior, and match your cleaning products to each surface material. Use Bar Keepers Friend for stainless steel and Simple Green for painted surfaces. Replace drip pans only after the full clean is complete to avoid wasting them.
Now that you know how to clean a Weber Genesis grill like a pro, make it part of your seasonal ritual. Set a reminder for your spring and fall deep cleans, stock up on the right supplies, and commit to quick after-cook wipe-downs. Your next barbecue will thank you with perfect sear marks, even heating, and flavor that’s never compromised by old grease.