How to Start a Weber Grill
You’ve finally bought that Weber grill you’ve been eyeing, but now you’re staring at it wondering where to begin. Or maybe your trusty Weber won’t light and dinner is already late. Starting a Weber grill the wrong way can mean wasted fuel, uneven cooking, or even a dangerous gas buildup. The good news is that once you learn the correct sequence for your model, lighting becomes second nature.
This guide walks you through exactly how to start a Weber grill using charcoal, liquid propane, natural gas, or electric power. You’ll learn the step-by-step ignition process for each fuel type, model-specific instructions for the Genesis II LX, manual lighting techniques when the igniter fails, and quick fixes for common start-up problems.
Charcoal Grill Ignition Steps

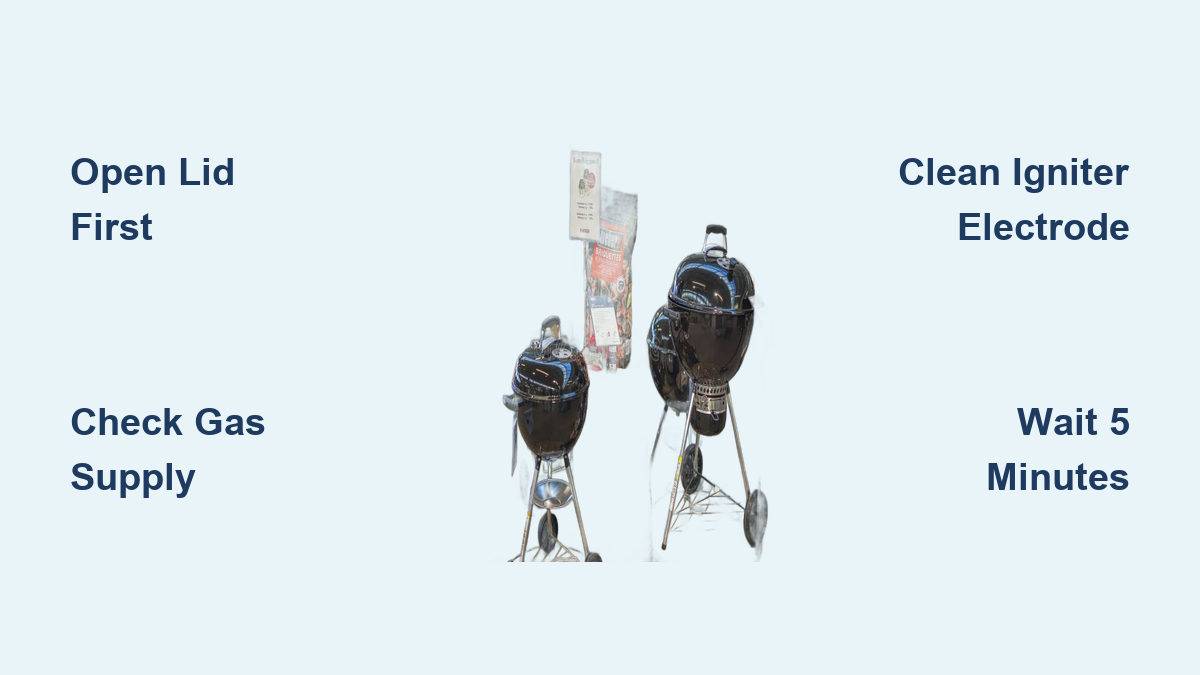
Charcoal grills need the most hands-on approach, but the right tools make all the difference. Using a chimney starter and lighter cubes is far safer and cleaner than relying on lighter fluid, which can leave chemical residues on your food.
Use a Rapid Fire Chimney Starter
The chimney starter uses rising heat to ignite coals evenly from the bottom up. This method produces consistent heat without the flare-ups caused by liquid accelerants.
- Measure the charcoal your recipe calls for using the included briquette scoop.
- Pour the measured charcoal into the chimney starter.
- Place three Weber lighter cubes directly on the coal grate inside the grill.
- Set the chimney starter directly over the lighter cubes.
- Light the cubes and wait until flames appear at the top of the chimney.
- Carefully shake the glowing coals into the grill basket while wearing heat-resistant gloves.
Pro Tip: Watch for sparks when dumping coals. Keep your hands and face clear of the chimney during transfer.
Choose Between Charcoal and Briquettes
Weber offers two main fuel options for charcoal grills:
- Pure charcoal lights faster and burns hotter, making it ideal for quick searing.
- Briquettes burn longer and more consistently, which works better for slow grilling sessions.
For most backyard cooking, briquettes deliver more reliable temperature control.
Gas Grill Ignition: Standard Procedure
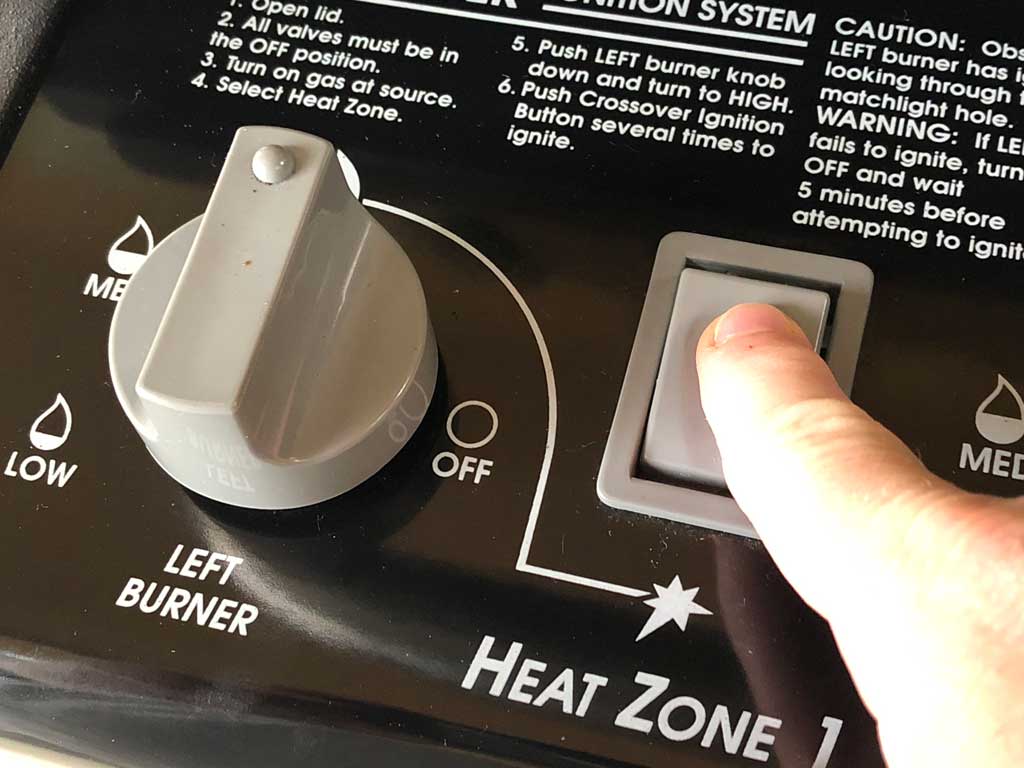
Weber gas grills use electronic ignition for fast, reliable starts. Following the correct order matters because skipping steps or closing the lid too early can prevent ignition entirely.
Always Open the Lid First
This rule applies to every gas grill, every time. Gas accumulates rapidly inside a closed grill, and igniting that buildup can cause an explosion.
- Open the grill lid completely.
- Open the propane tank valve (for LP models) or natural gas supply valve.
- Turn the leftmost burner knob to “Start” or “High.”
- Wait two to three seconds to let gas flow into the burner tube.
- Press the igniter button once or twice until you hear ticking and see a spark.
- Look through the cooking grates to confirm a flame.
- Turn the remaining burners to “High” one at a time.
- Close the lid and preheat for 10 to 15 minutes.
Visual Cue: On Genesis II models, check the half-circle cutout in the Flavorizer bar to confirm a steady blue flame.
Handle Ignition Failures Safely
If the burner doesn’t light within four seconds, turn the knob off immediately and wait five full minutes before trying again. This waiting period clears any accumulated gas and prevents dangerous flashbacks.
Common reasons for ignition failure include:
- An empty propane tank
- A closed gas valve
- A dirty or misaligned igniter electrode
- Moisture trapped in the ignition system
Genesis II LX Natural Gas Start-Up
The Weber Genesis II LX natural gas model requires a more deliberate ignition sequence than standard LP grills. Natural gas needs extra time for the thermocouple to sense heat and keep the gas valve open.
Verify All Knobs Are Off First
Before opening the gas supply, confirm every burner knob is fully closed. Push each knob in and turn it clockwise until it stops.
Open the Gas Supply Valve
Locate the shut-off valve where the grill connects to your home’s gas line. Turn the valve counterclockwise to open it. If a regulator is present, make sure its lever sits in the “On” position.
Ignite the Leftmost Burner
- Push the leftmost control knob in toward the center of the grill.
- Slowly turn the knob counterclockwise toward the “Start/Ignite” position.
- Hold the knob in place for five to ten seconds while the igniter ticks.
- Look through the Flavorizer bar cutout to verify a steady flame.
- Adjust the heat level once the burner stays lit.
Why the long hold? The thermocouple needs time to heat up. Once it senses flame, it keeps the gas valve open. Releasing too early causes the flame to die.
Light the Remaining Burners
After the first burner is stable, turn it off and repeat the push-turn-hold process for the next burner. Always work from left to right for the most consistent results.
Note: Never try to light all burners at once. Lighting them individually ensures each one ignites properly.
Manual Lighting When the Igniter Fails

A broken igniter doesn’t mean the end of your cookout. You can safely light any Weber gas grill with a long-reach lighter or fireproof match.
Prepare for a Manual Light
- Turn off all burner knobs and close the gas supply valve.
- Open the grill lid fully.
- Turn one burner knob to “Start” or “High.”
Apply the Flame Safely
- Insert a long lighter or match through the side of the cooking grates, aiming near the burner tube.
- Turn the control knob to “On” while holding the flame in place.
- The burner should ignite within a few seconds.
- Hold the knob down for 30 seconds after lighting to heat the thermocouple.
Warning: Never lean over the grill during manual lighting. Stand to the side and use a long tool to keep distance from the flame.
Confirm Flame and Light Other Burners
Once the first burner burns steadily, turn on the remaining burners one at a time. Close the lid and preheat as normal.
Troubleshooting Tip: If manual lighting also fails, the problem likely involves blocked gas flow or a clogged burner tube rather than the igniter itself.
Electric Weber Grill Operation
Electric grills offer the simplest start-up process with no fuel tanks, open flames, or ignition systems to worry about.
Plug In and Power On
- Plug the grill into a standard 120V outlet.
- Turn the controller to “High.”
- Close the lid.
- Wait 25 minutes for the grill to reach full preheat temperature.
Important: Always keep the lid closed during preheating on electric models. The closed lid ensures proper heat distribution throughout the cooking chamber.
Begin Cooking
After 25 minutes, the grill reaches approximately 500°F. Place food on the grate and adjust the controller to match your recipe’s temperature needs.
Best Use: Electric models work perfectly for apartments, balconies, or anywhere open flames are restricted.
Troubleshoot Common Start-Up Issues
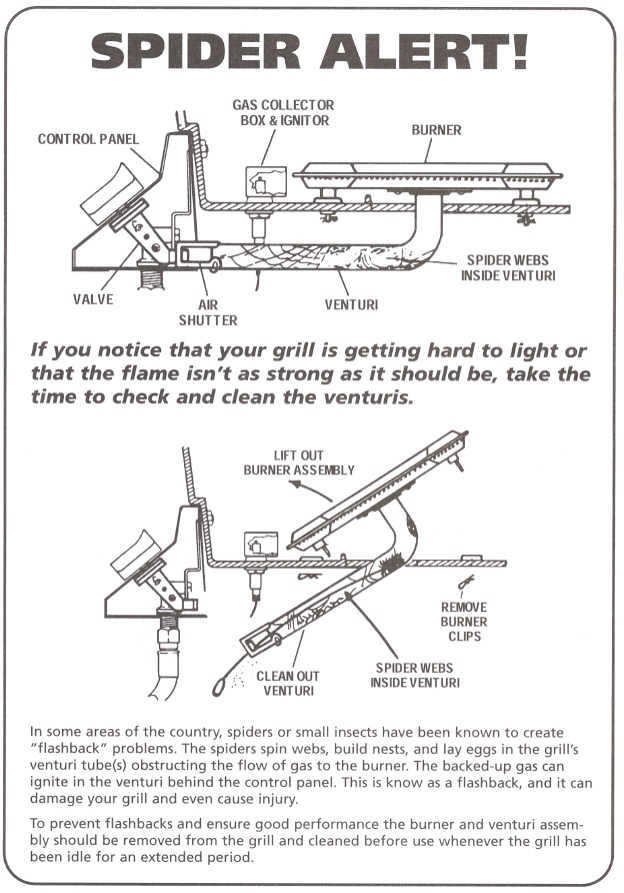
Even experienced grillers run into ignition problems. Use these diagnostic steps to identify and fix the most frequent issues.
No Flame After Ignition Attempt
- Cause: Gas isn’t flowing to the burner.
- Fix: Check that the propane tank has fuel. Confirm the gas valve is fully open by turning it counterclockwise. For natural gas models, verify the house supply is on.
Clicking Sound But No Spark
- Cause: Dirty or misaligned igniter electrode.
- Fix: Locate the electrode near the burner. Gently clean it with a soft brush or dry cloth. Realign the electrode so the spark gap measures about ¼ inch from the burner surface.
Flame Goes Out When You Release the Knob
- Cause: Thermocouple didn’t heat up enough.
- Fix: Hold the knob down longer. Use 30 seconds for manual lights and 5 to 10 seconds for natural gas models. Check for cold drafts that may be cooling the thermocouple.
Uneven or Weak Flame
- Cause: Clogged burner tube or blocked venturi.
- Fix: Turn off the gas and let the grill cool completely. Remove the cooking grates and inspect the burner tubes. Use a wire brush or pipe cleaner to clear any debris.
Pro Tip: Perform a quick visual inspection of your burner tubes once a month, especially before peak grilling season.
Essential Tools and Safety Tips
The right equipment makes starting your Weber faster, safer, and more reliable.
Required Tools by Fuel Type
| Fuel Type | Must-Have Tools |
|---|---|
| Charcoal | Chimney starter, lighter cubes, briquette scoop, heat-resistant gloves |
| Gas (LP/NG) | Long-reach lighter (backup), soft brush for electrode cleaning |
| Electric | None beyond a grounded outlet |
Critical Safety Rules
- Never close the lid while lighting the grill. Gas buildup can cause an explosion.
- Wait five full minutes after any failed ignition attempt before retrying.
- Keep a fire extinguisher within reach whenever you grill.
- Use long-handled tools to keep your hands away from heat.
- Store propane tanks upright and outdoors in a ventilated area.
Final Check: Always verify flame presence before placing food on the grate. A steady blue flame means your grill is ready to cook.
Maintain Reliable Ignition Performance
Regular maintenance prevents most start-up problems and extends your grill’s lifespan.
Clean Igniter Electrodes Monthly
Dirt, grease, and weather exposure reduce spark efficiency over time.
- Turn off the gas and let the grill cool.
- Locate the electrode near each burner.
- Wipe it gently with a dry cloth.
- Realign the electrode if bent, maintaining a ¼-inch gap from the burner.
Inspect Gas Hoses and Connections
For LP models, check the hose annually for cracks or wear. Apply soapy water to all connections. Bubbles forming indicate a leak that needs immediate repair.
Replace Igniter Batteries When Needed
Some models use a battery-powered igniter. If the clicking stops, open the igniter housing and replace the battery with a fresh AA or 9V cell, depending on your model.
Frequently Asked Questions About Starting a Weber Grill
Do you light a Weber grill with the lid open or closed?
Always open the lid before turning on the gas or lighting the grill. Closing the lid allows gas to accumulate inside the cooking chamber, which creates an explosion hazard when ignited.
How long does it take to preheat a Weber gas grill?
After lighting all burners, close the lid and preheat for 10 to 15 minutes. Electric Weber grills require 25 minutes of preheating with the lid closed to reach optimal cooking temperature.
What should I do if my Weber grill won’t light?
Turn the burner knob off immediately and wait five minutes to let any accumulated gas clear. Check that the propane tank has fuel and the gas valve is fully open. Clean the igniter electrode with a soft brush if it’s dirty. If the igniter still won’t work, use a long-reach lighter to manually light the burner.
Can I use lighter fluid in a Weber charcoal grill?
Weber recommends against lighter fluid because it produces chemical tastes and increases flare-ups. A chimney starter with Weber lighter cubes delivers cleaner, more even ignition.
How do I know if my Weber grill is lit?
Look through the cooking grates for a visible flame. On Genesis II models, check the half-circle cutout in the Flavorizer bar. A steady blue flame confirms the burner is lit and ready for cooking.
Why does my Weber grill flame go out when I release the knob?
The thermocouple hasn’t heated up enough to keep the gas valve open. Hold the knob down for 30 seconds when manually lighting, or 5 to 10 seconds on natural gas models, to give the thermocouple time to sense the flame.
Key Takeaways for Starting Any Weber Grill

Learning how to start a Weber grill properly saves time, prevents accidents, and delivers better cooking results. The most important rule across every model is to open the lid before introducing any gas or flame. Match your ignition method to your fuel type: chimney starters for charcoal, electronic ignition for gas, and simple plug-in operation for electric models.
When ignition fails, work through the problem methodically. Check the fuel supply, clean the igniter electrode, and always wait five minutes after a failed attempt before trying again. For older models or persistent issues, your owner’s manual (available at weber.com) contains model-specific guidance.
Now that you know the correct sequence for your grill, fire it up with confidence. Your next great meal is just a safe, successful ignition away.