How to Connect a Propane Tank to a Grill
Nothing ruins a backyard cookout faster than a grill that won’t light, or worse, a gas leak you didn’t catch in time. Knowing how to connect a propane tank to a grill safely is essential for every homeowner, camper, or RV user who relies on gas grilling. Whether you’re setting up a new grill, swapping an empty tank, or hooking into an RV propane line, one mistake can lead to dangerous leaks, poor performance, or equipment damage.
This guide walks you through every step, from safety checks and proper attachment to leak testing and troubleshooting, using only verified procedures. You’ll learn how to avoid common pitfalls like over-tightening, double regulation, and undetected leaks. By the end, you’ll be able to connect your propane tank confidently and enjoy consistent, high-performance cooking every time.
Essential Safety Prep Before Connecting
Work Outdoors With Proper Ventilation
Always connect a propane tank outdoors in a well-ventilated space. Never attempt this indoors, in a garage, or under a covered patio where gas can accumulate. Propane is heavier than air and can settle, creating an explosive hazard if ignited.
Inspect Grill and Tank Conditions
Before handling the tank, confirm the grill is off and the lid is fully open. If an old tank is attached, remove it first. Check the propane cylinder for dents, rust, or corrosion. Do not use damaged tanks. Ensure the hand wheel on top is in the OFF position (turned clockwise) before connecting.
Verify Regulator and Hose Integrity
Examine the regulator (the round device on the hose end) and the hose itself. Look for cracks, brittleness, or signs of wear. Never use a frayed or kinked hose. Replace damaged components immediately rather than risking a gas leak.
Keep Fire Safety Equipment Nearby
Have a Class B fire extinguisher within reach during setup and first ignition. A garden hose or bucket of sand can also serve as a backup in emergencies.
Step-by-Step: Connect Propane Tank to Grill
Remove the Tank Safety Cap
Take off the blue plastic cap covering the tank’s valve outlet. This cap protects the valve threads from debris when not in use. Store it safely. You’ll need it when disconnecting the tank later.
Align and Attach the Regulator
Hold the grill’s regulator connector and align it straight with the tank valve. Push it down firmly until it seats. Then tighten the coupling nut by hand, turning clockwise.
– Tighten snugly, but never force it
– Over-tightening damages the POL seal and can strip threads, making future disconnections difficult or unsafe
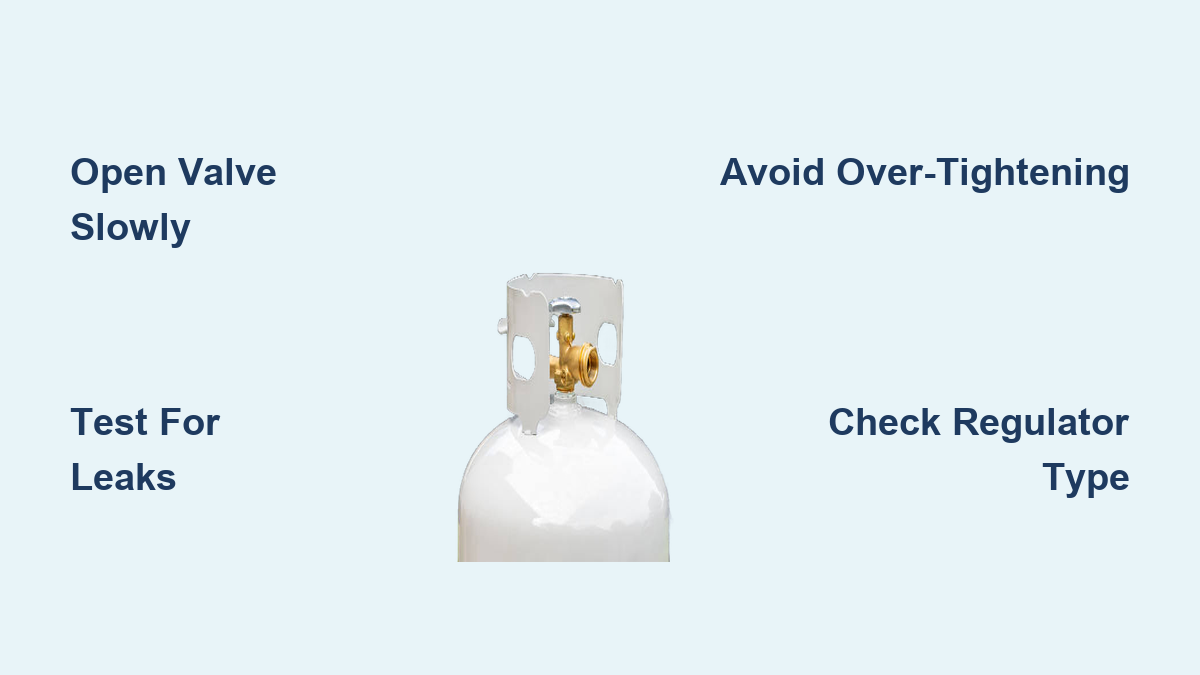
Open the Tank Valve Slowly
Turn the tank’s hand wheel counterclockwise to open the gas flow.
– Open just a quarter turn first to allow the regulator to pressurize gradually
– After a few seconds, open it fully. The valve only needs one full turn to be fully open
Wait for System Stabilization
Let the gas flow for 10–15 seconds before attempting to light the grill. This allows the regulator to equalize pressure and deliver a steady stream to the burners.
Test for Gas Leaks Immediately
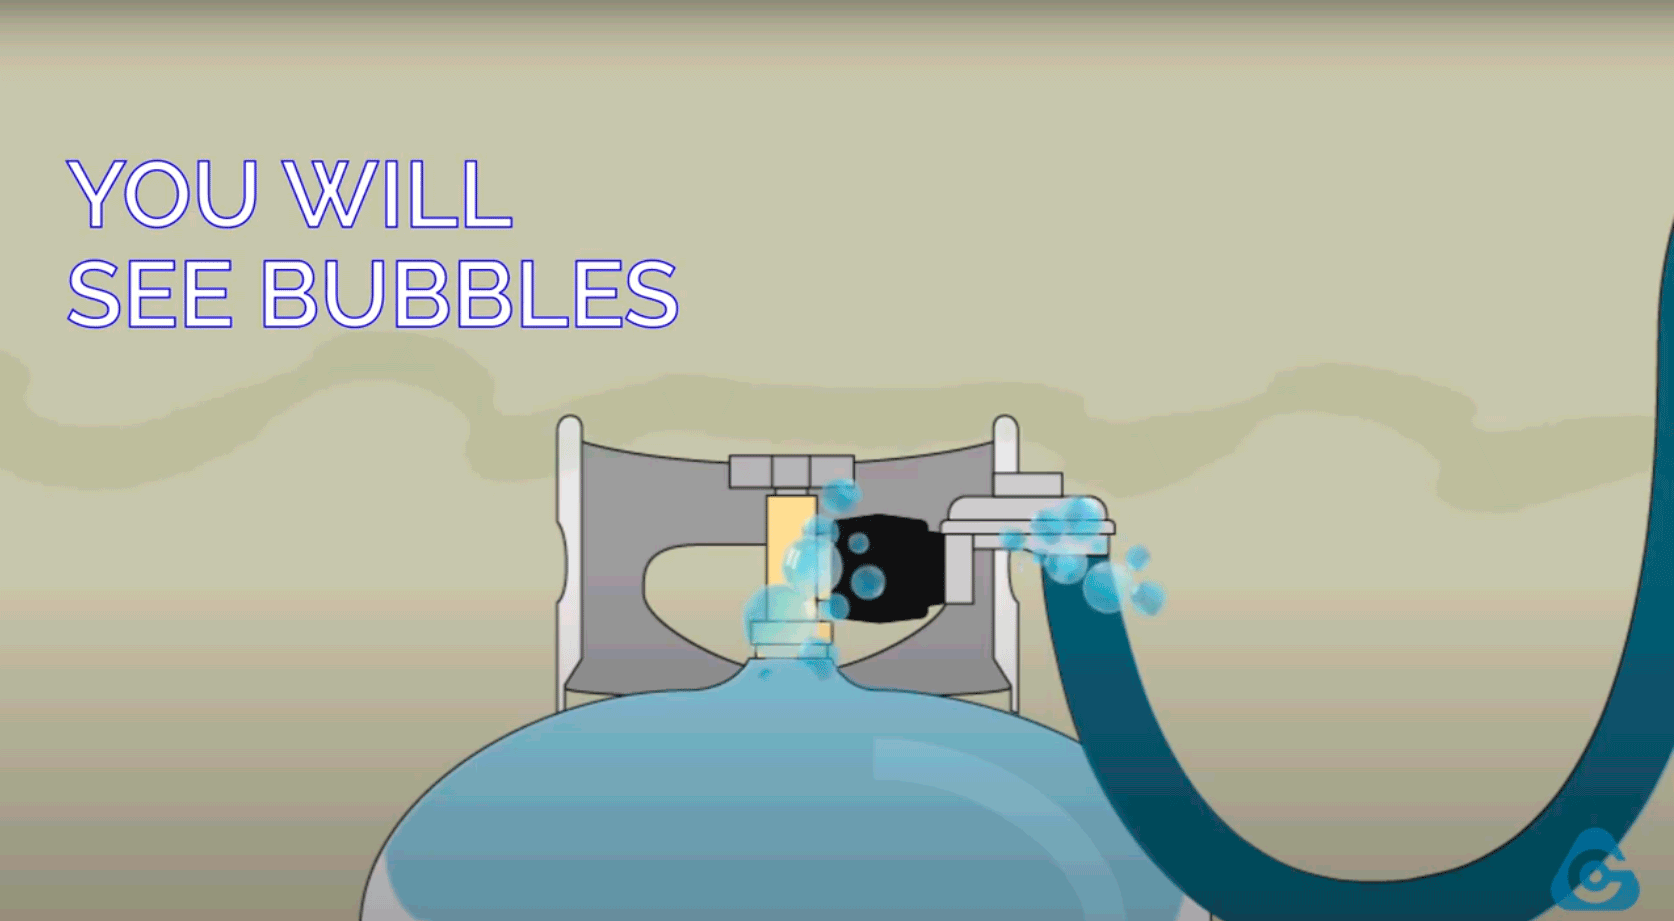
Apply a Soapy Water Solution
Mix dish soap with water in a spray bottle or small bowl. With the tank valve open, apply the solution to:
– The connection between the regulator and tank valve
– The hose ends and fittings
– Any visible joints or bends
Watch for Bubbling
If bubbles form and grow, you have a gas leak.
– No bubbles? Connection is secure. Proceed to ignition
– Bubbles present? Shut off the tank immediately
Fix and Re-Test Any Leaks
Close the tank valve, disconnect the regulator, and reattach it. Ensure proper alignment and snug tightening without forcing it. Reapply soapy water and test again. Repeat until no bubbles appear.
⚠️ Never use a flame or lighter to check for leaks. This is extremely dangerous and can cause fire or explosion.
Ignite the Grill Safely
Open the Lid and Turn On Burners
Always keep the grill lid open before igniting. Turn one burner knob to “Start” or “High.” If using an electric igniter, press the button. If it doesn’t light after 3–5 seconds, turn the knob off, wait 5 minutes for gas to clear, then retry.
Light Remaining Burners
Once the first burner is lit, turn on adjacent burners to cross-ignite. If no ignition occurs, use a long-reach lighter or match.
Follow Manufacturer Instructions
Some grills require holding the knob in for 10–30 seconds to activate the thermocouple. Consult your model’s manual for specific startup steps.
Special Case: Connect Grill to RV Propane Line
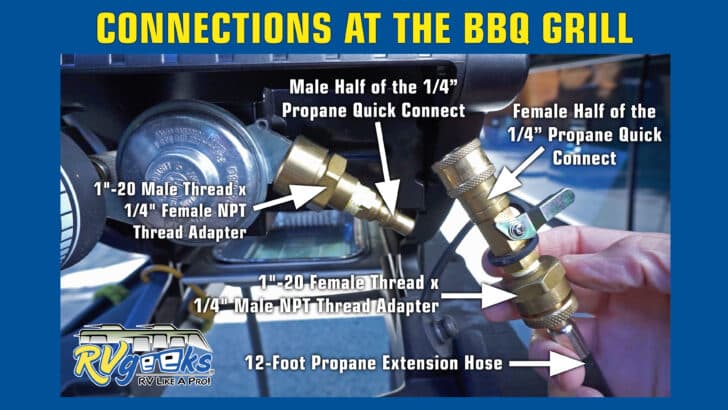
Avoid Double Regulation
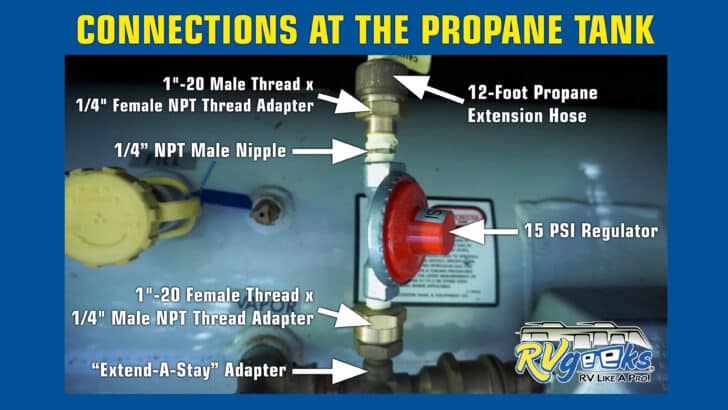
RV propane systems already have a primary regulator. Most portable grills come with a secondary regulator. Connecting both causes low gas pressure, preventing the grill from lighting.
Use an Unregulated Hose
To fix this, replace the standard grill hose with a straight, unregulated hose with no built-in pressure reducer. This allows pre-regulated RV gas to flow directly to the grill.
Alternative: Use a Portable Tank
For simplicity, many RV users prefer a 5 lb portable tank instead. It’s easy to disconnect, refill, and avoids modifying the grill. Just connect it like a standard tank. No regulator removal needed.
Pro Tip: Label your unregulated hose clearly to avoid accidentally using it on a standard setup, which could damage your grill.
Maintenance and Best Practices
Test for Leaks Regularly
Perform a bubble test:
– Before first use each season
– After long storage
– Any time the tank is reconnected
Even a small leak can become a serious hazard over time.
Replace Worn Components
Hoses and regulators degrade with UV exposure and temperature changes. Replace:
– Hoses every 3–5 years
– Regulators if they cause weak flames or frequent clogs
– Any part showing cracks, stiffness, or discoloration
Store the Tank Safely
When not in use:
– Close the tank valve
– Disconnect and replace the blue cap
– Store upright in a dry, shaded area away from heat sources
Never store a propane tank indoors, in a vehicle, or in direct sunlight.
Troubleshoot Common Connection Issues

Grill Won’t Light
Check these causes:
– Tank valve not fully open
– Double regulation (if using RV line)
– Clogged burner ports or spider guards
– Failed igniter battery
Fix: Open valve fully, use unregulated hose if on RV, clean burners, or use a lighter.
Weak or Uneven Flames
Likely causes:
– Faulty or outdated regulator
– Kinked or blocked hose
– Low propane level
Fix: Replace regulator, straighten hose, or swap to a full tank.
Smell of Gas or Bubbles During Test
Immediate action:
– Turn off tank
– Disconnect and reseat regulator
– Re-test
– If leak persists, replace regulator or hose
If you smell gas and can’t isolate the source, stop use and contact a propane service provider.
Hard to Unscrew the Tank
Usually due to over-tightening during a prior connection.
– Use a firm grip and steady pressure. Don’t jerk
– In the future, tighten only until snug
– Consider using a rubber grip pad for better leverage
Frequently Asked Questions About Connecting a Propane Tank to a Grill
How tight should the propane tank connection be?
The connection should be snug, not forced. Over-tightening can strip threads or damage the POL seal, making future removal difficult and potentially causing leaks. Hand-tighten clockwise until it stops naturally.
How do I know if my propane connection is leaking?
Apply a soapy water solution to the connection point with the valve open. If bubbles form and grow, you have a leak. If no bubbles appear, the connection is secure. Never use a flame to check for leaks.
Can I connect a propane grill to my RV’s propane system?
Yes, but you must remove the grill’s built-in regulator first. RV propane lines are already regulated, and using both regulators causes low pressure that prevents the grill from lighting. Use a straight, unregulated hose for this setup, or use a 5 lb portable tank instead.
Why won’t my grill light after connecting the propane tank?
Common causes include a tank valve that isn’t fully open, double regulation (on RV systems), clogged burner ports, or a dead igniter battery. Open the valve fully, check for kinks in the hose, clean the burners, or try lighting manually with a long lighter.
How often should I replace my grill’s propane hose and regulator?
Replace hoses every 3–5 years, or sooner if you notice cracks, stiffness, or discoloration. Replace the regulator if you experience weak flames, frequent clogs, or inconsistent burner performance.
Is it safe to store a propane tank in my garage?
No. Propane tanks should always be stored outdoors, upright, in a dry, shaded area away from heat sources. Never store a propane tank indoors, in an enclosed vehicle, or in direct sunlight.
Key Takeaways for Connecting a Propane Tank Safely
Connecting a propane tank to a grill is straightforward when done correctly, but one missed safety step can lead to disaster. Always work outdoors with the lid open, inspect equipment before use, tighten connections snugly without forcing them, and perform a bubble test every time you reconnect.
For RV users, remember that portable tanks are safer and easier than modifying your grill for direct RV line hookup, unless you’re set up for it permanently with an unregulated hose.
Now that you know how to connect a propane tank to a grill the right way, fire it up with confidence and enjoy safe, reliable grilling all season long.